
ZZZ Textures and properties
The current tutorial assumes you already know how to mod the game and all the basics of 3D modeling. Concepts such as UV, texturing, modeling, kit-bashing, import and export won't be covered here. Feel free to learn more basic concepts at my modding guide.
ZZZ models have a few types of information encoded into their meshes other than the mere position of their vertex. That would be its normals, tangents, uvs, vertex color and weights.
Normals, tangents and weights are needed for the proper rendering of a 3d model and won't be covered here. The first two have some incidence on outline shape but the plugins should deal with them automatically for you.
Table of Contents
Vertex Color
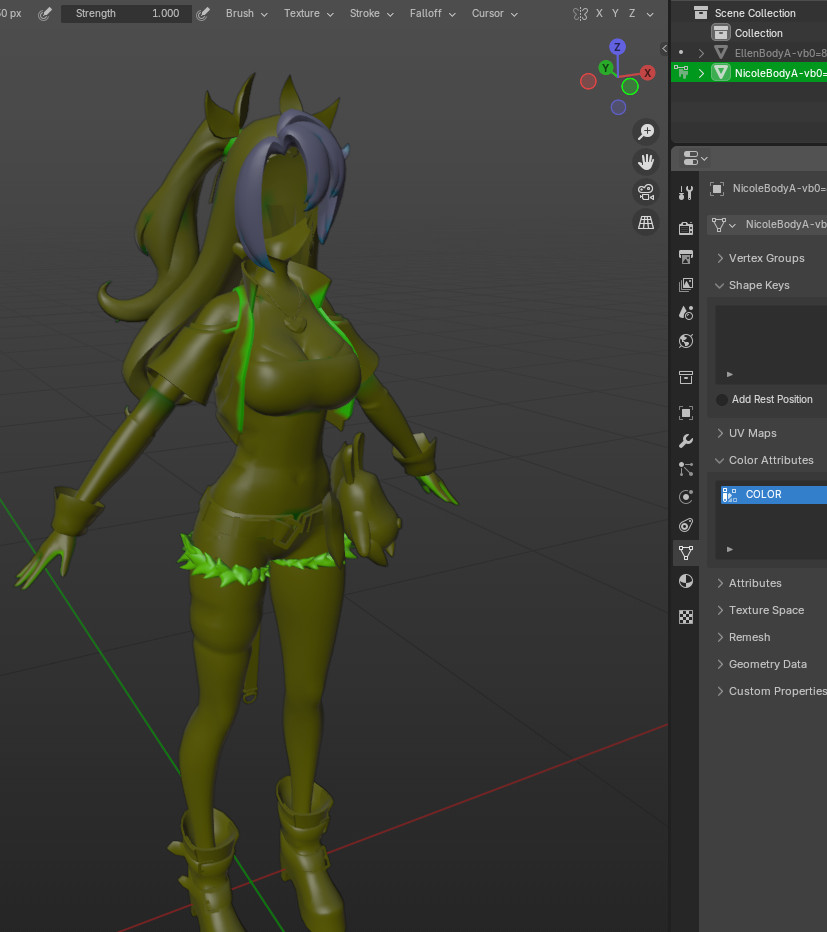 I've set up a custom material in order to comfortably visualize vertex color as I work on it and of course for illustration purposes in this guide. Feel free to copy the node setup.
Red channel
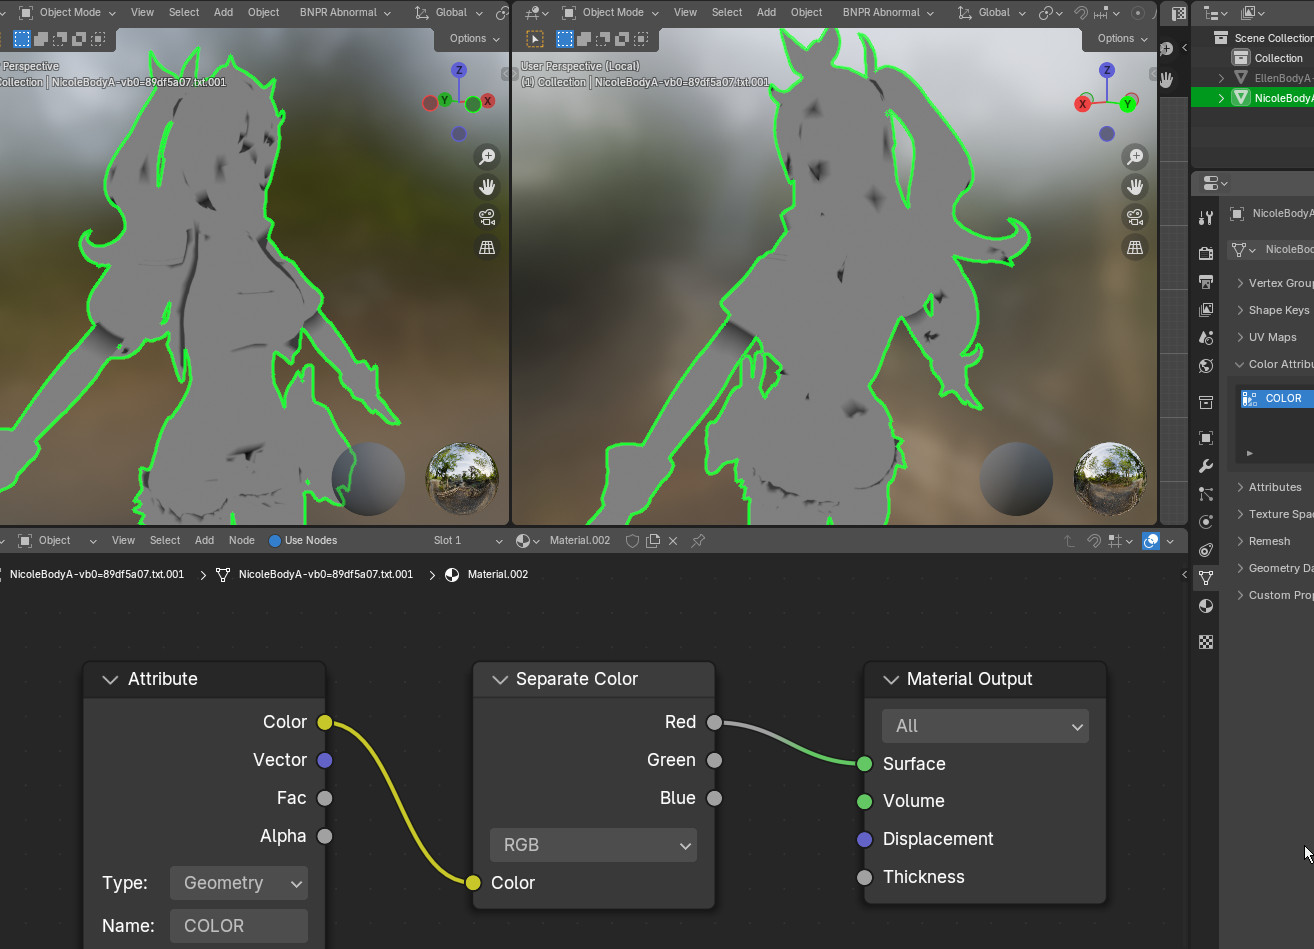
Is hard to tell at first what is the purpose of this channel so allow me to walk you through it. The game uses it as a way to thicken or thin the outline around the character. For example at the end of a hair strand the outline becomes thinner to get that hand drawn lineart effect. That is why you see some dark spots all over Nicole's hair. It is also used around some edges of her clothing for a similar effect. There is not specific pattern that a mod maker should follow when dealing with these, is simply a tool that gives more control over what's shown on the screen. By default you might want to just make it a flat grey as most of her body is.
Green Channel
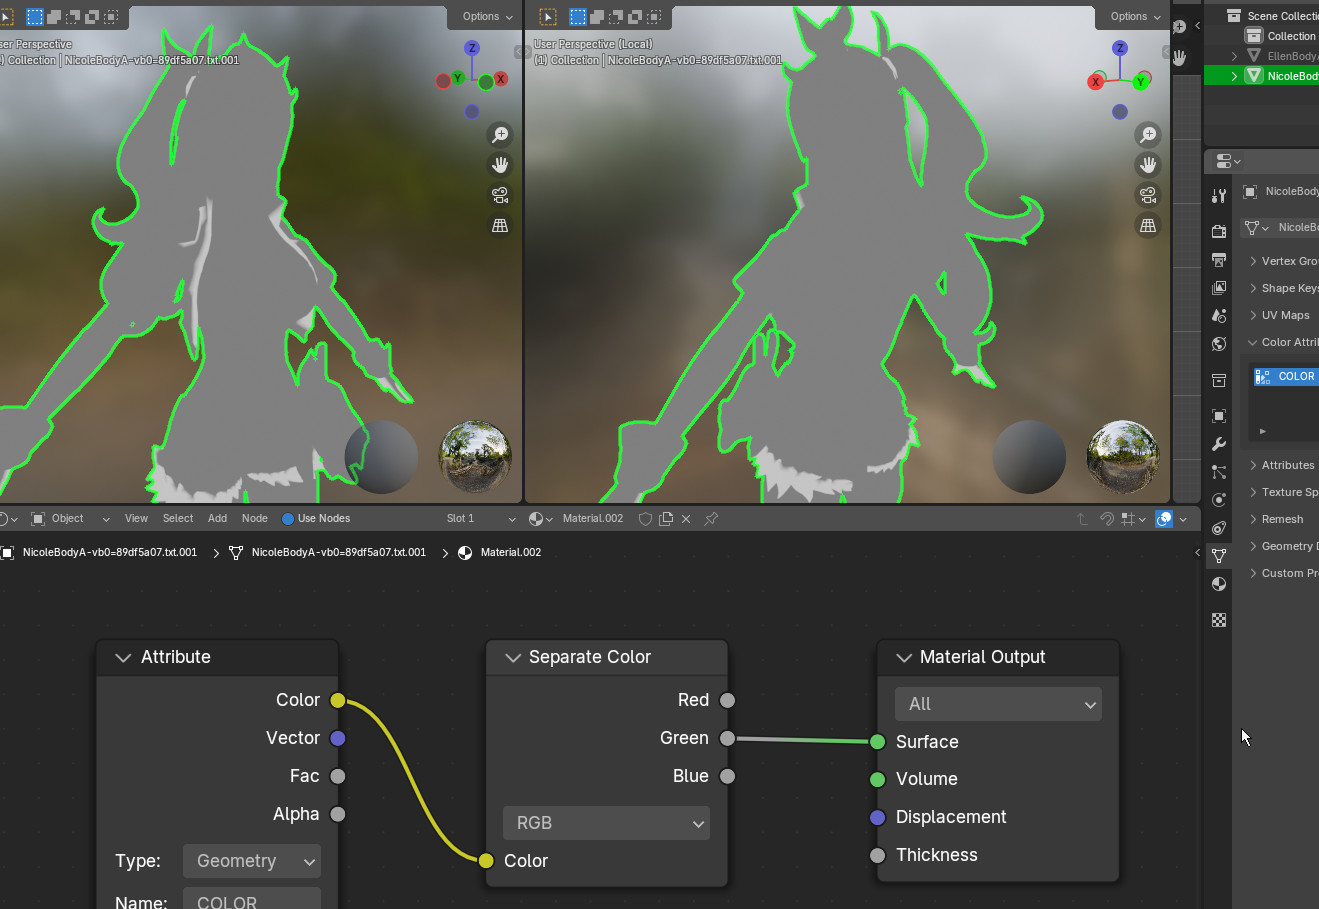
This is the one I am least confident about. I have my theories about its use but the pattern breaks from character to character. So feel free to dm me information about it if you get to testing it at some point. To avoid it causing issues, defaulting it to a midtone again is the safe bet.
Blue channel
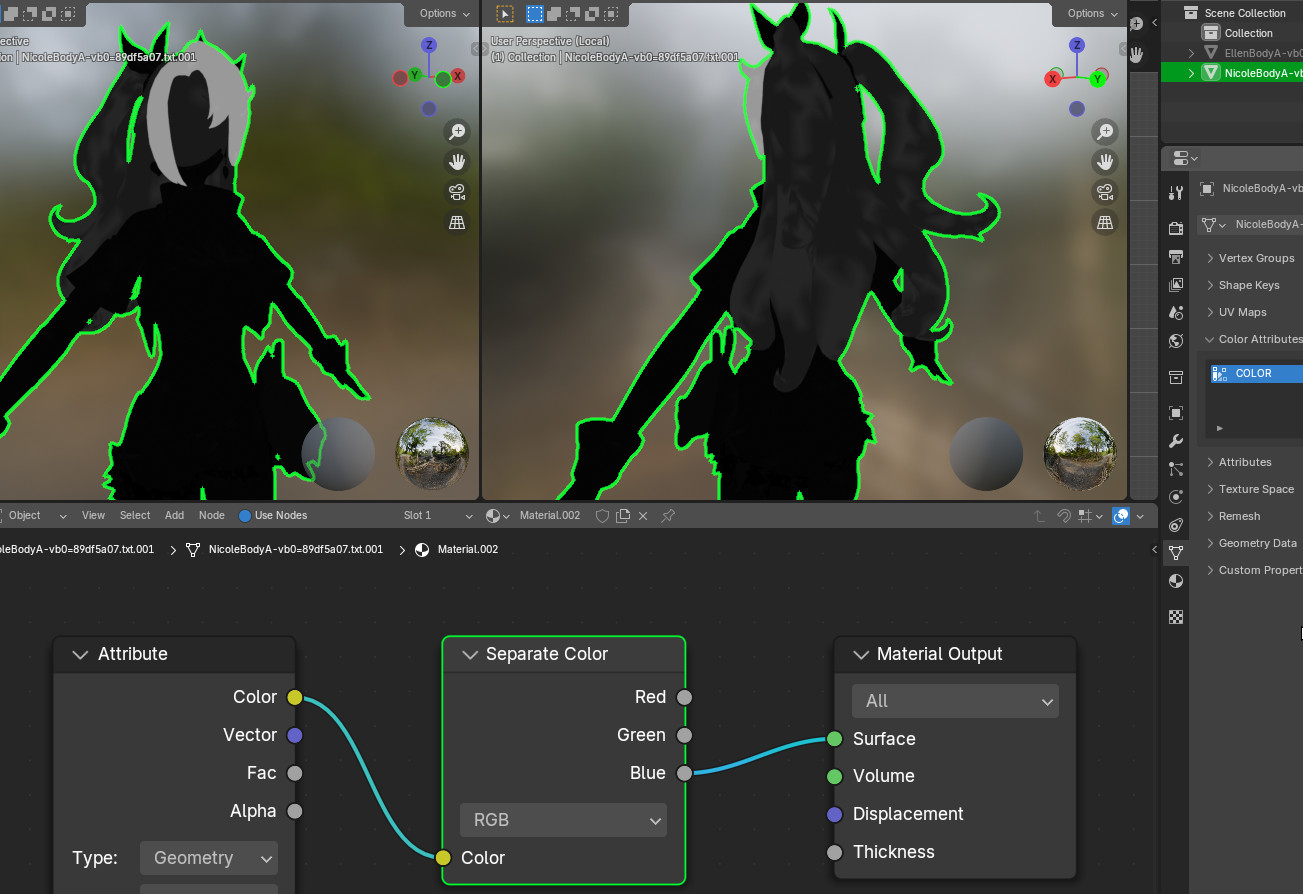
This one seems to be exclusively used on hairstyles. And my supposition is that is used as a guide to tell the game what part of the hair should cast a harder shadow over the body. It is also useful to identify which part of the mesh is hair- So the game might be using it to give hairstyles a different shading in general as well. More testing is required to confirm these suspicious. Defaulting to absolute 0 or black seems fine for the body in general.
Alpha channel
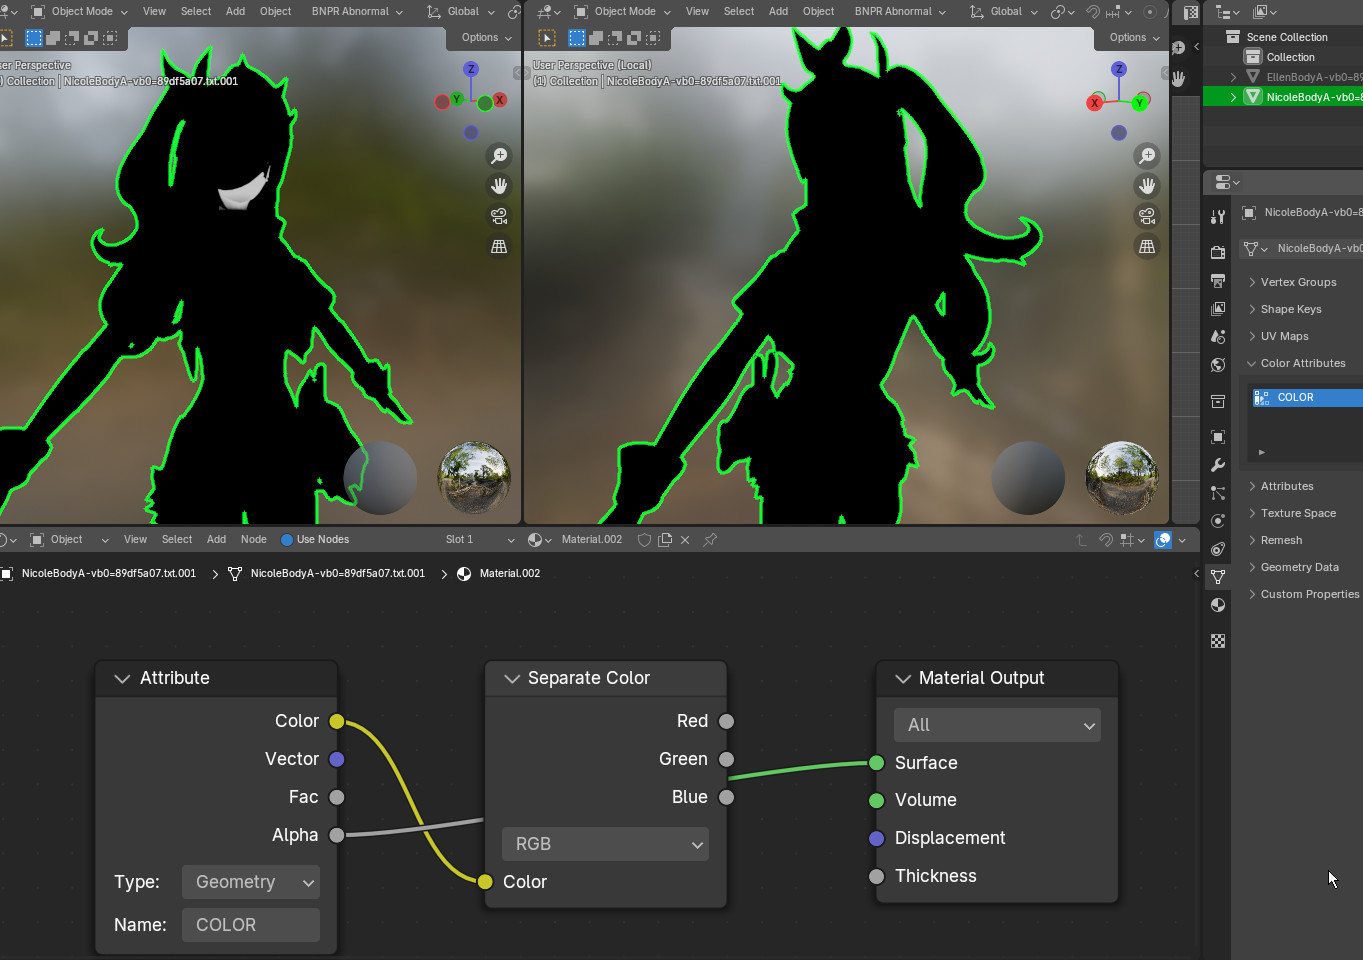
Seems to be related to the neck of the character but I haven't had time nor need to modify it so far. I tend to simply keep the original neck of the character fully circumventing having to deal with this. It might be useful however for some special shading cases.
Texture slots and their purpose
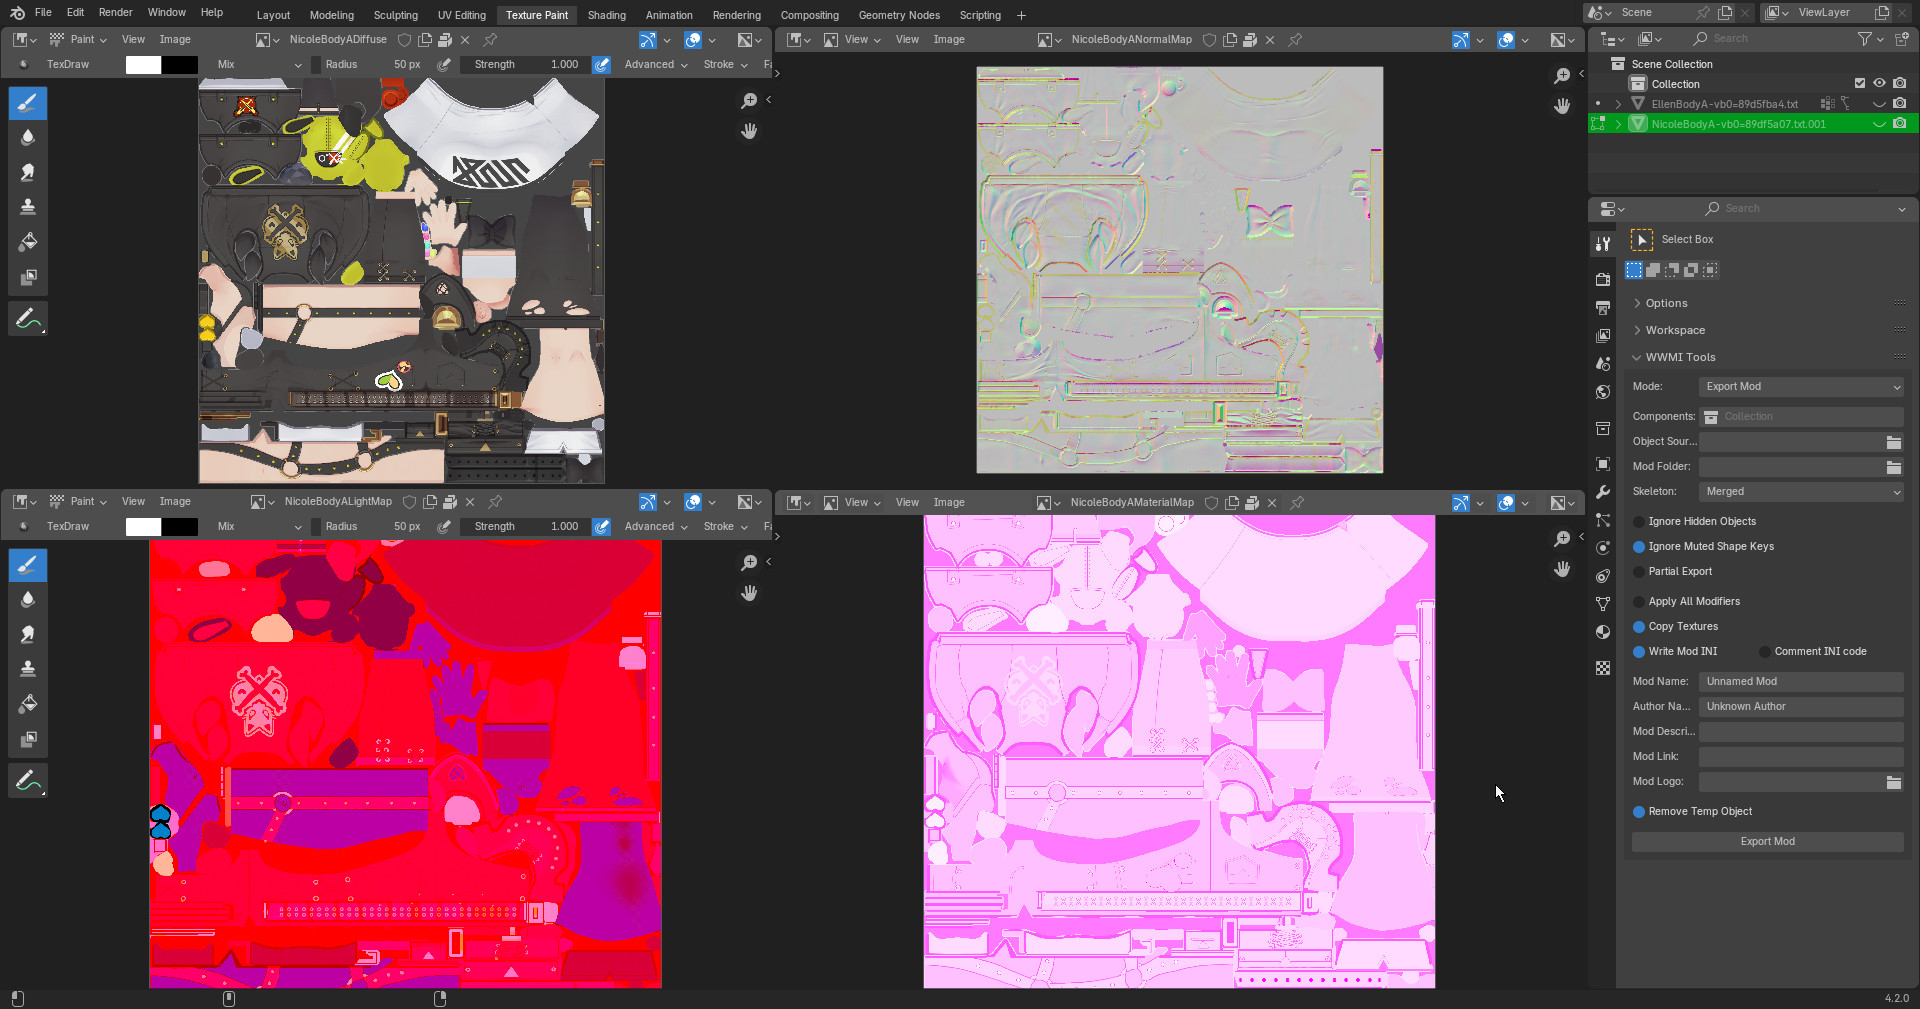
The images top left Diffuse, top right NormalMap, bottom left LightMap, bottom right MaterialMap.
The names are somewhat technically wrong but they are good enough as to identify what is the general purpose of each image.
The diffuse texture is simply the coloring of the mesh and is encoded in BC7 sRGB while the rest is BC7 Linear.
The normal map red and green channels keep the vertical and horizontal normal information for the mesh. Whilst its blue channel is an occlusion mask.
The LightMap and material map tend to look similar and can be confusing, as a rule of thumb the material map tends to be mostly pink or mostly orange overall. While the lightmap seems to be generally red. There is no guarantee in this of course but is a good guide.
The LightMap red channel encodes outline and shadowramp information for each part of the mesh in what seems to be up to 5 thresholds of intensity. This is quite similar to the alpha channel in genshin's LM.
The green channel is metallic and the blue is some form of gloss.
The Material Map's red channel seems to be used on some models to encode which part of the mesh should be transparent and how intense that is. Keep in mind this is not used in all characters. Good examples are Anby's glass box on her backpack or glasses in some characters.
The green channel is another form of metallic-ness but is hard to describe it in a single word.
The blue channel seems to be specular information, but again is not quite it in the traditional PBR sense.
UVs
TEXCOORD.xy
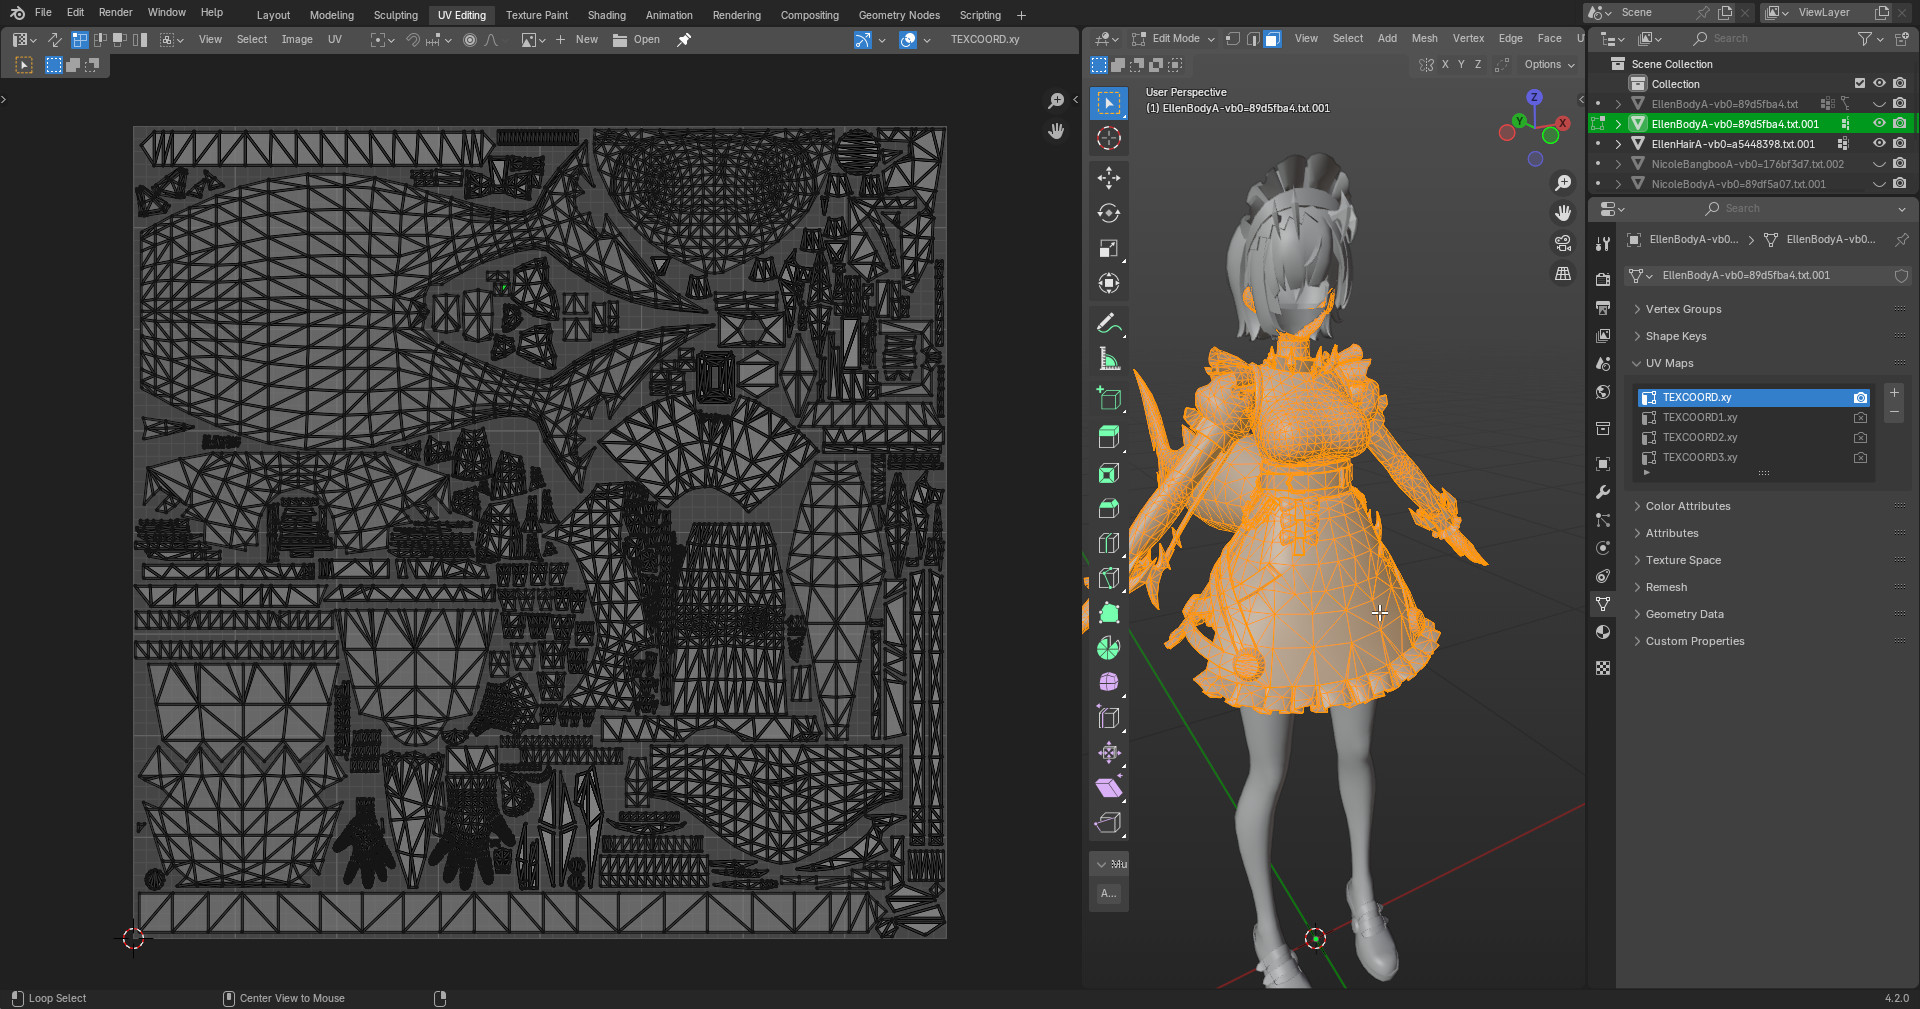
This one is a classic mesh that maps your 2D texture to the 3D space
TEXCOORD1.xy
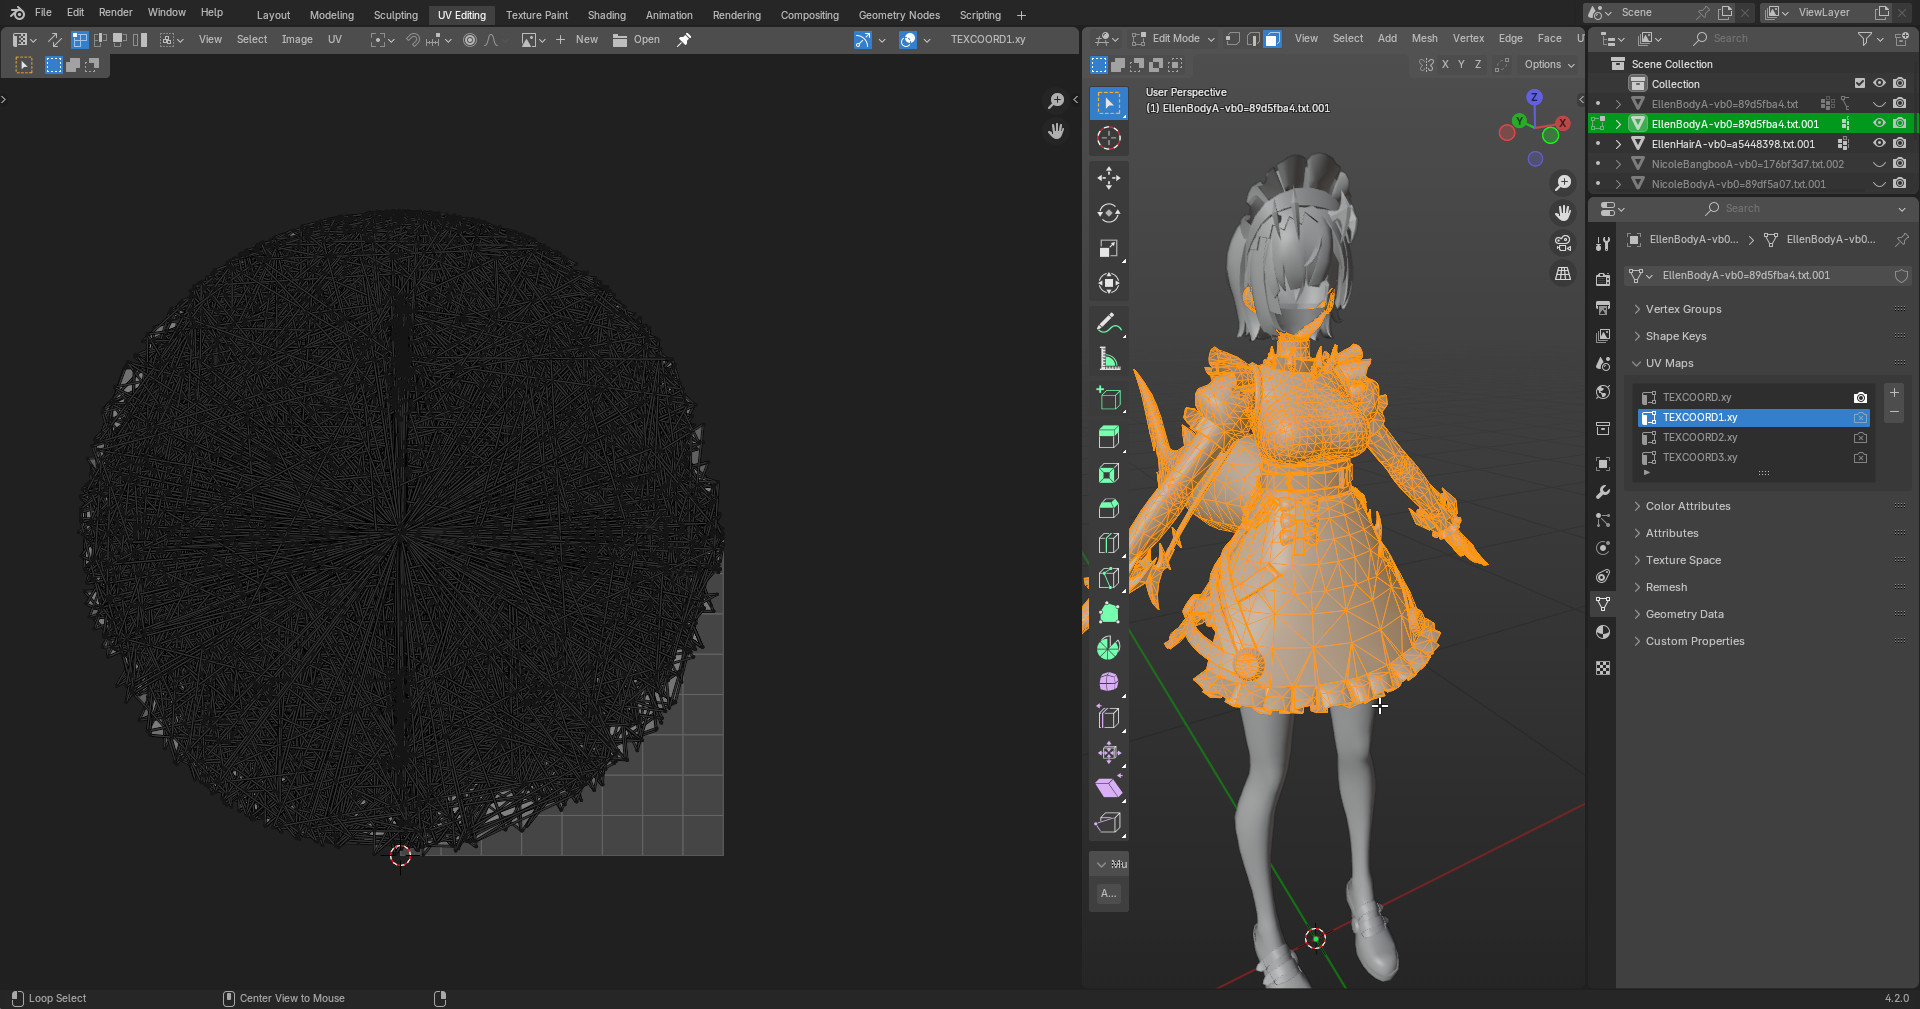
This is quite the odd one no? I will elaborate further on it further down the lane. It has its uses but its quite nieche.
TEXCOORD2.xy
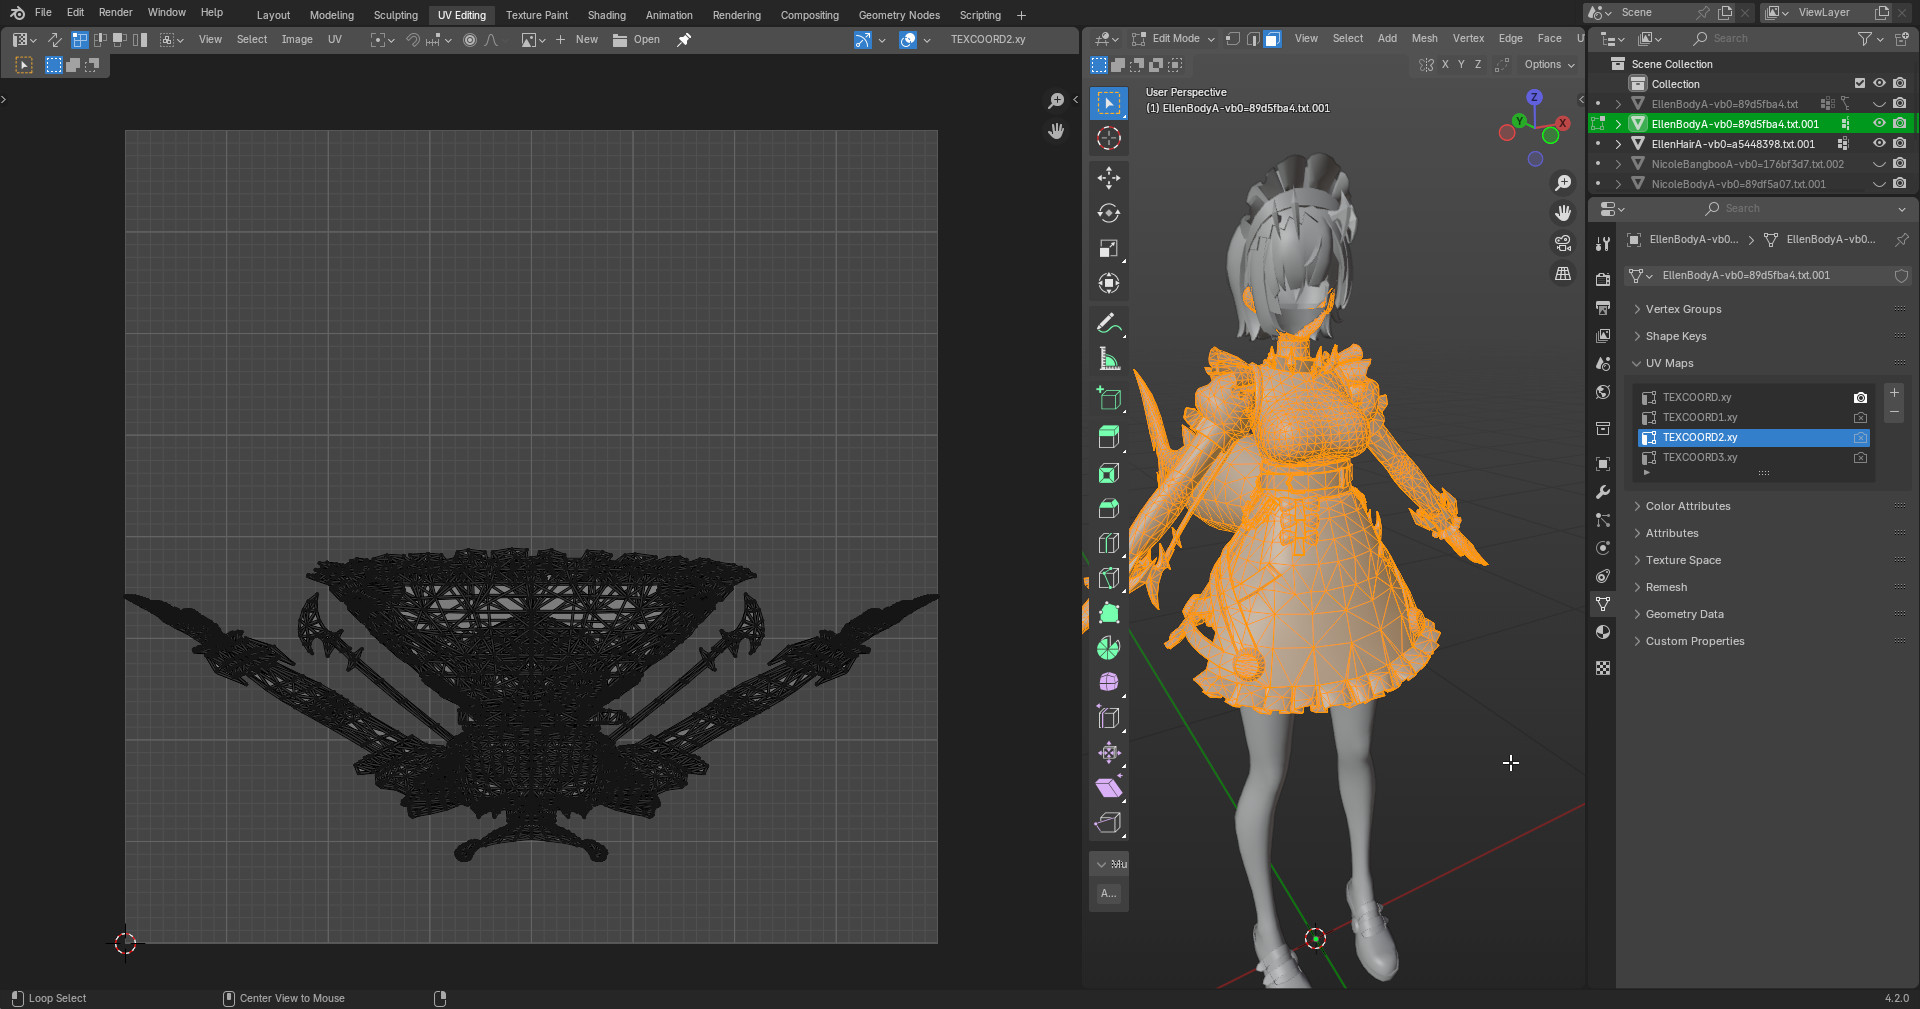
This is simply an isometric projection of your mesh, it is likely used by the game for some visual effects. If you add mesh to your model you will need to generate this one.
TEXCOORD3.xy
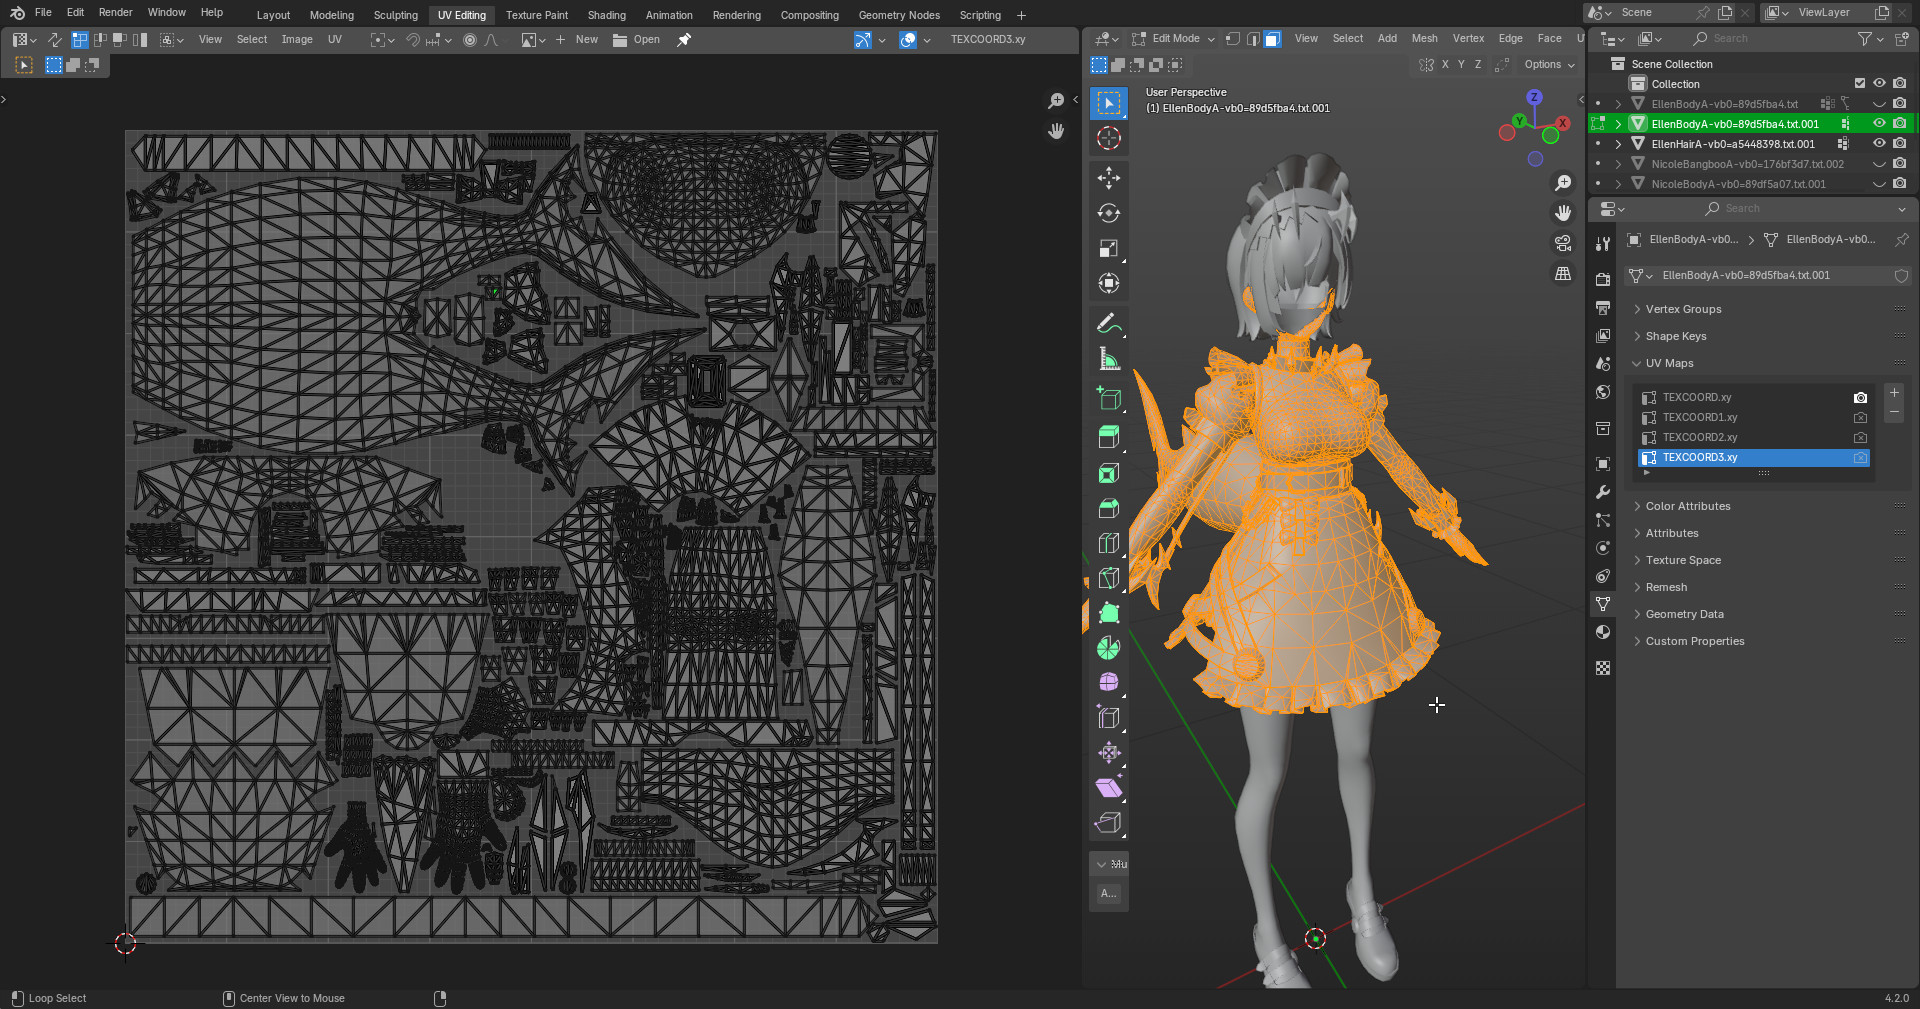
Last but not least. This one is almost the same as TEXCOORD.XY but it can be used to map the inner side of a mesh to a different part of the texture, for example the underside of a skirt. There are alternative methods to achieve this effect so don't worry if it gets troublesome to use.
A note on TEXCOORD1.xy
This is used by the game for some operation over the outline of the character. I can't quite tell exactly what it does but it can make it so a new added mesh looks different from the original. When put side by side it will become very evident. So I've made a pair of node setups that make it easier to visualize them. Their values go from -1 to 1 hence why a giant ball ends up showing it int's UV.
If your mesh looks weird and you have no idea how to fix it, it might be related to these. The easy fix is to UV unwrap your mesh for this UV and scale the uv to 0. Then move the result to the top left corner of the uv. That will equal to 0 on both axis.
All of these will need to be updated as more mods are made and a better understanding of these values comes to light so please let me know anything you find out about these.
TL;DL
Material Map
- R: Transparency(when enabled)
- G: God Knows
- B: Specular-ish
Light Map
- R: Shadowramp / outline config (Can be preset color or darkened diffuse)
- G: Metalic
- B: Gloss
Normal Map
- R: Normal Map Vertical
- G: Normal Map Horizontal
- B: Oclussion
Vertex paint
- R: Outline Thicc
- G: God knwos but maybe Z-depth outline
- B: Contact shadow intensity - MAYBE
- Alpha: Something about the neck man