3DMigoto GIMI Texture Modding Tutorial
Writen by: SilentNightSound
This tutorial will go through the process of modding GI’s textures.
This is useful if you want to change things like UI elements or banners (since many icons are drawn using the same vb/ib, meaning the GIMI plugins can’t be used to create mods) or just want to change a texture without making a full mod (e.g. wanting to change the color on an object or weapon but do not want to change the shape).
This tutorial will walk through two examples of texture modding: modding a wish banner and modding a character glider. Modding textures is slightly more difficult than making basic mesh edits, but much easier than importing custom models.
Prerequisites
Have the 3dmigoto GIMI Dev version installed, and setup either paint.net or photoshop to be able to open dds files (see Mona Hat tutorial for details).
I also strongly recommend having no mods active in Mods and no shaders in ShaderFixes as well since that can sometimes mess with the process.
Important Note
By default, the dev version of 3dmigoto is setup to dump ALL textures and buffers whenever you press F8, caused by this line in the d3dx.ini:

This will often result in massive (5-10 GB+) frame dumps – I strongly recommend commenting this line out like so:

And instead using [ShaderOverride] sections to specify what you are looking for when doing frame dumps. If space and time aren’t a concern however, or you are unable to find the shader that corresponds to the object you are looking for, uncommenting this and doing a full dump will still work.
Wish Banner
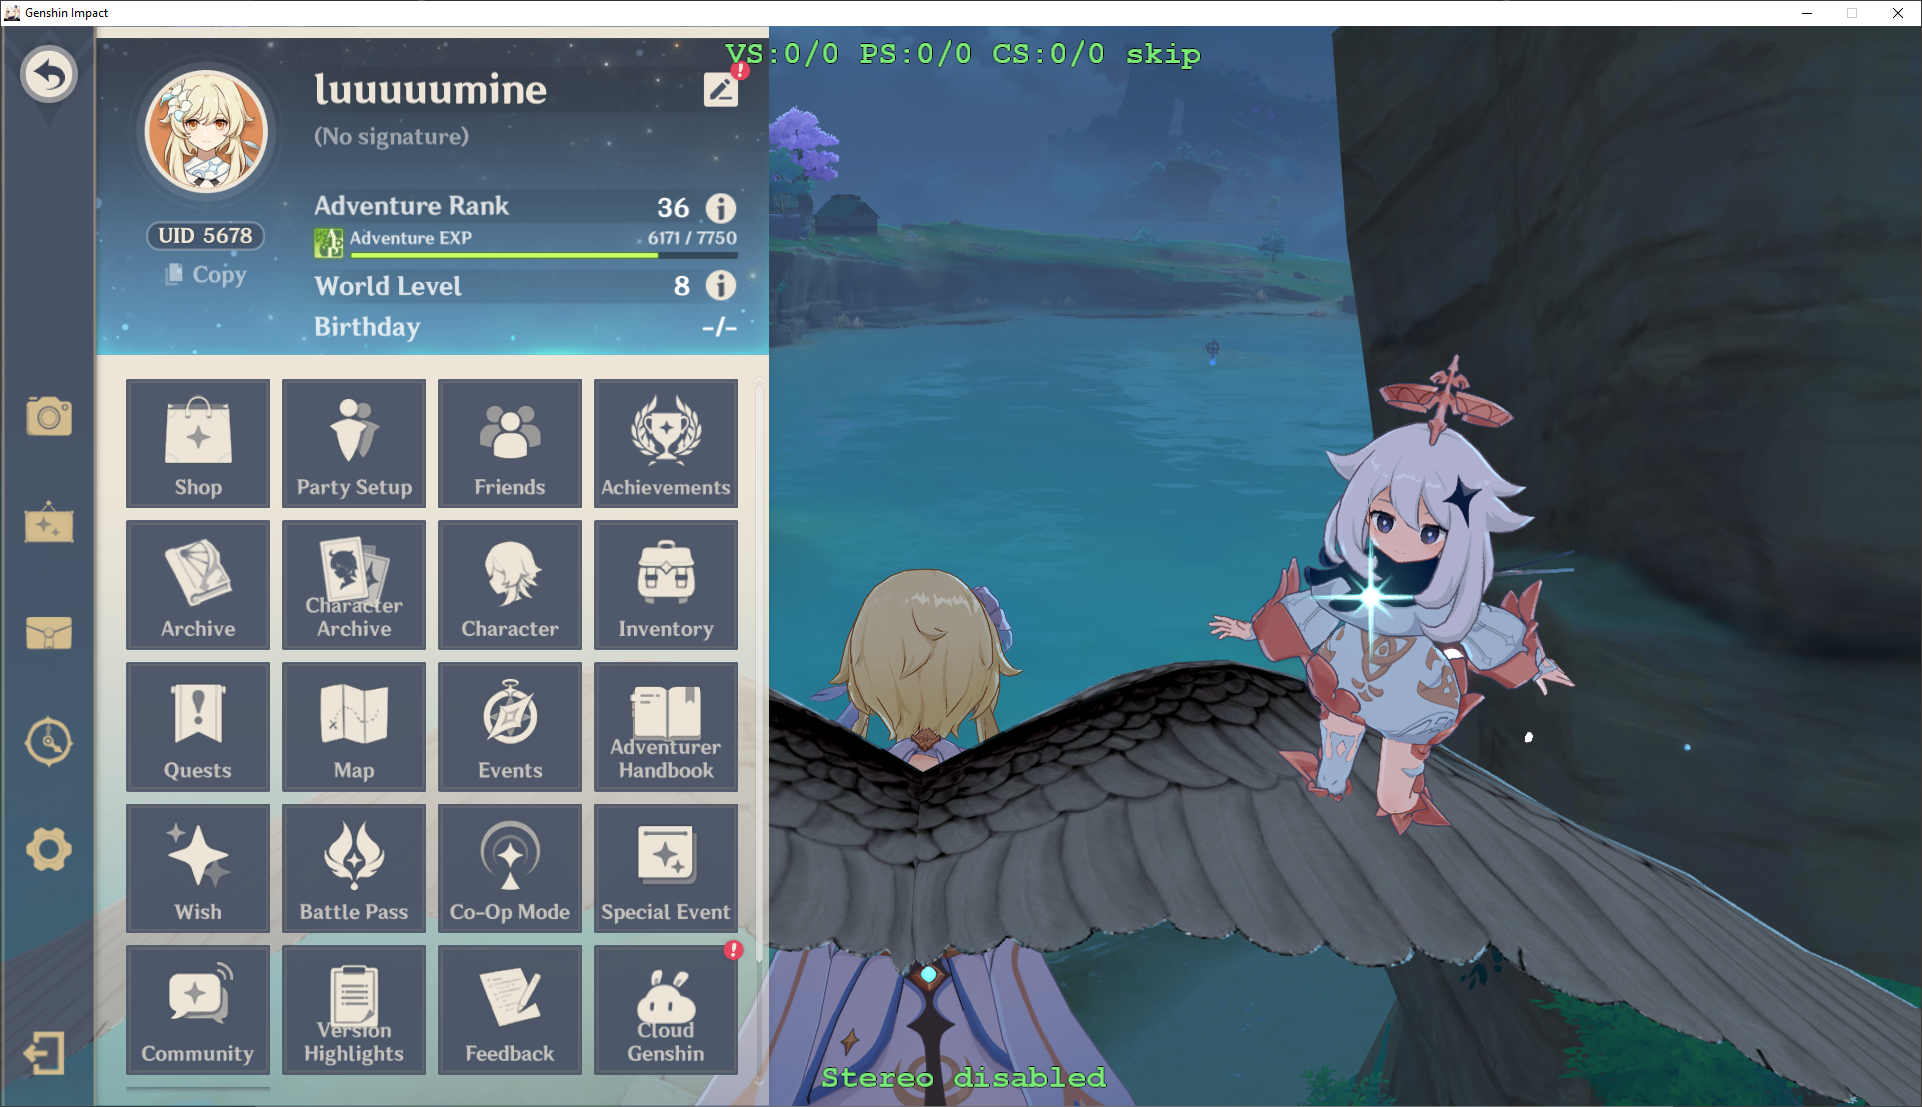
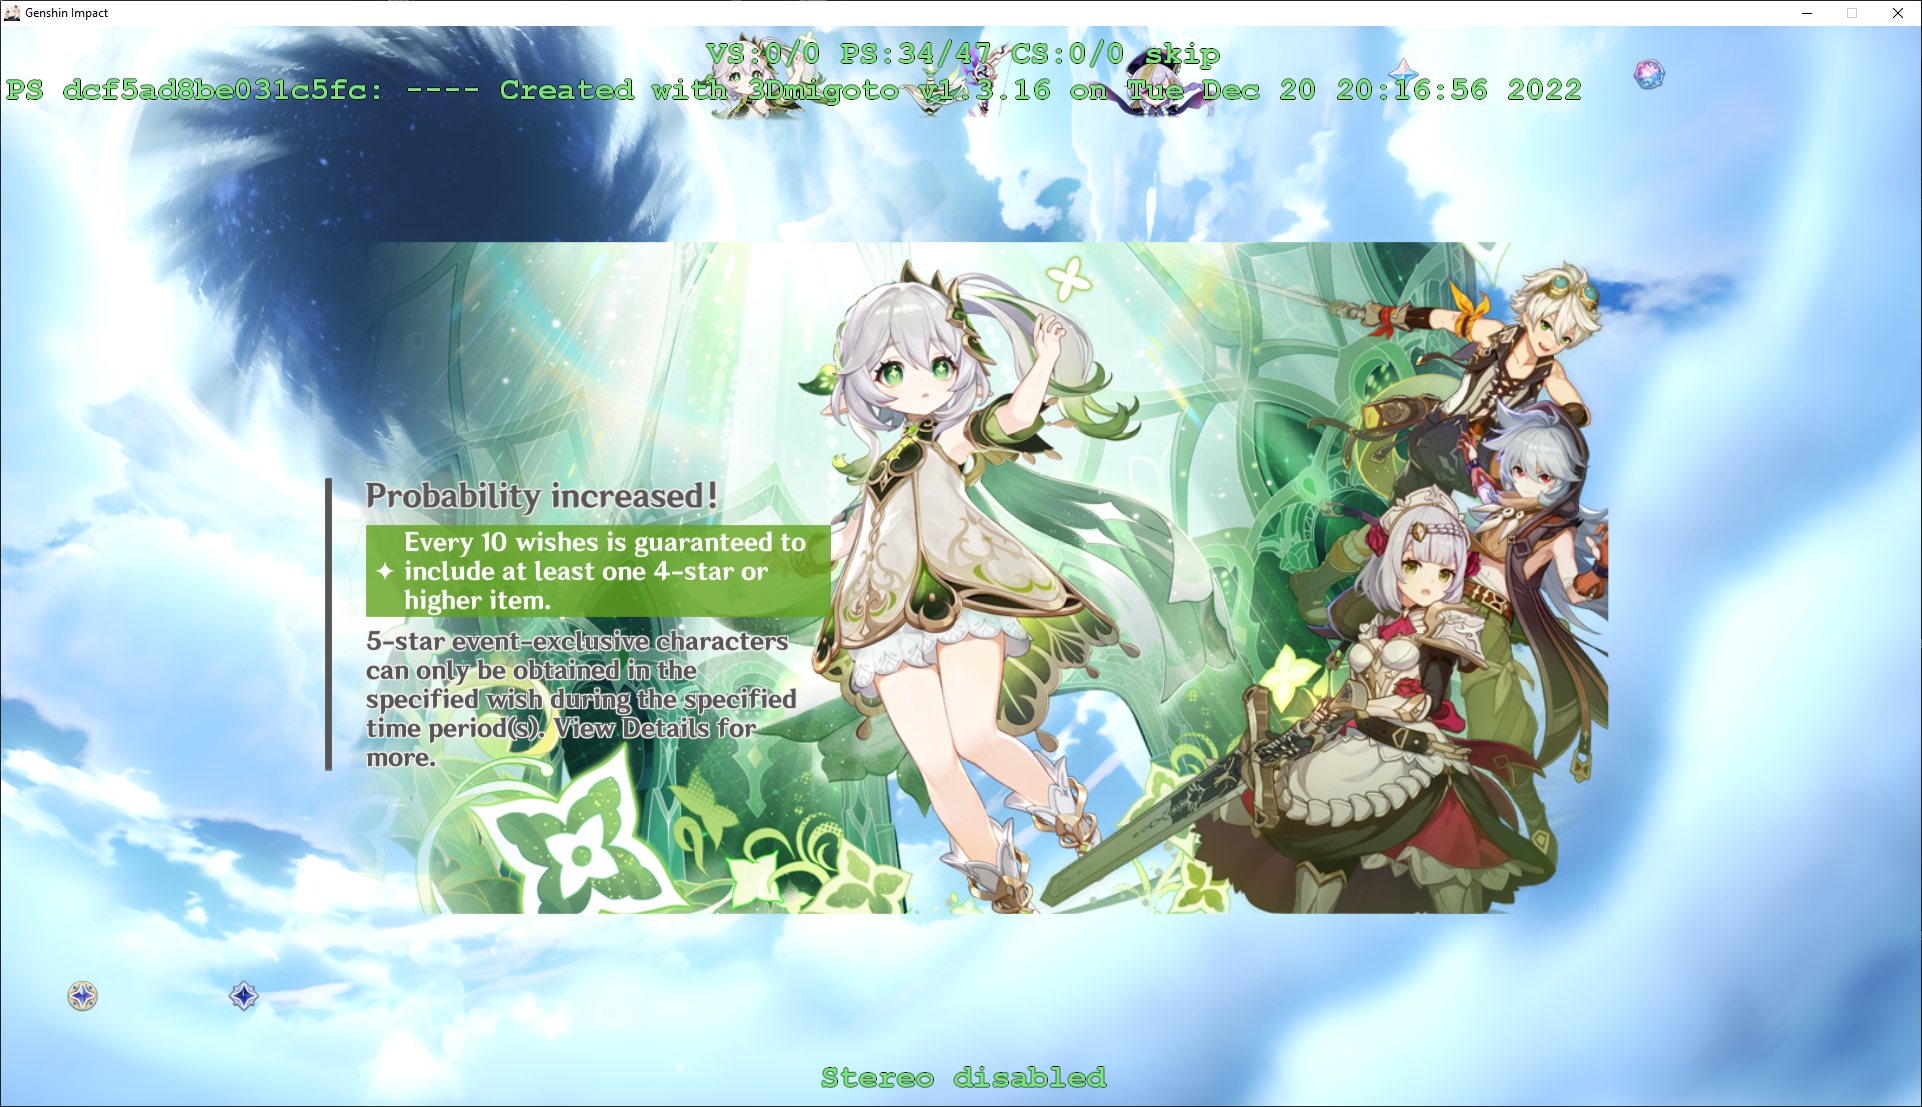
- The first step in modding textures is to hunt for the texture and its hash in-game. Make sure you are using the dev version and have the green text on the top and bottom, then go to the wish screen:
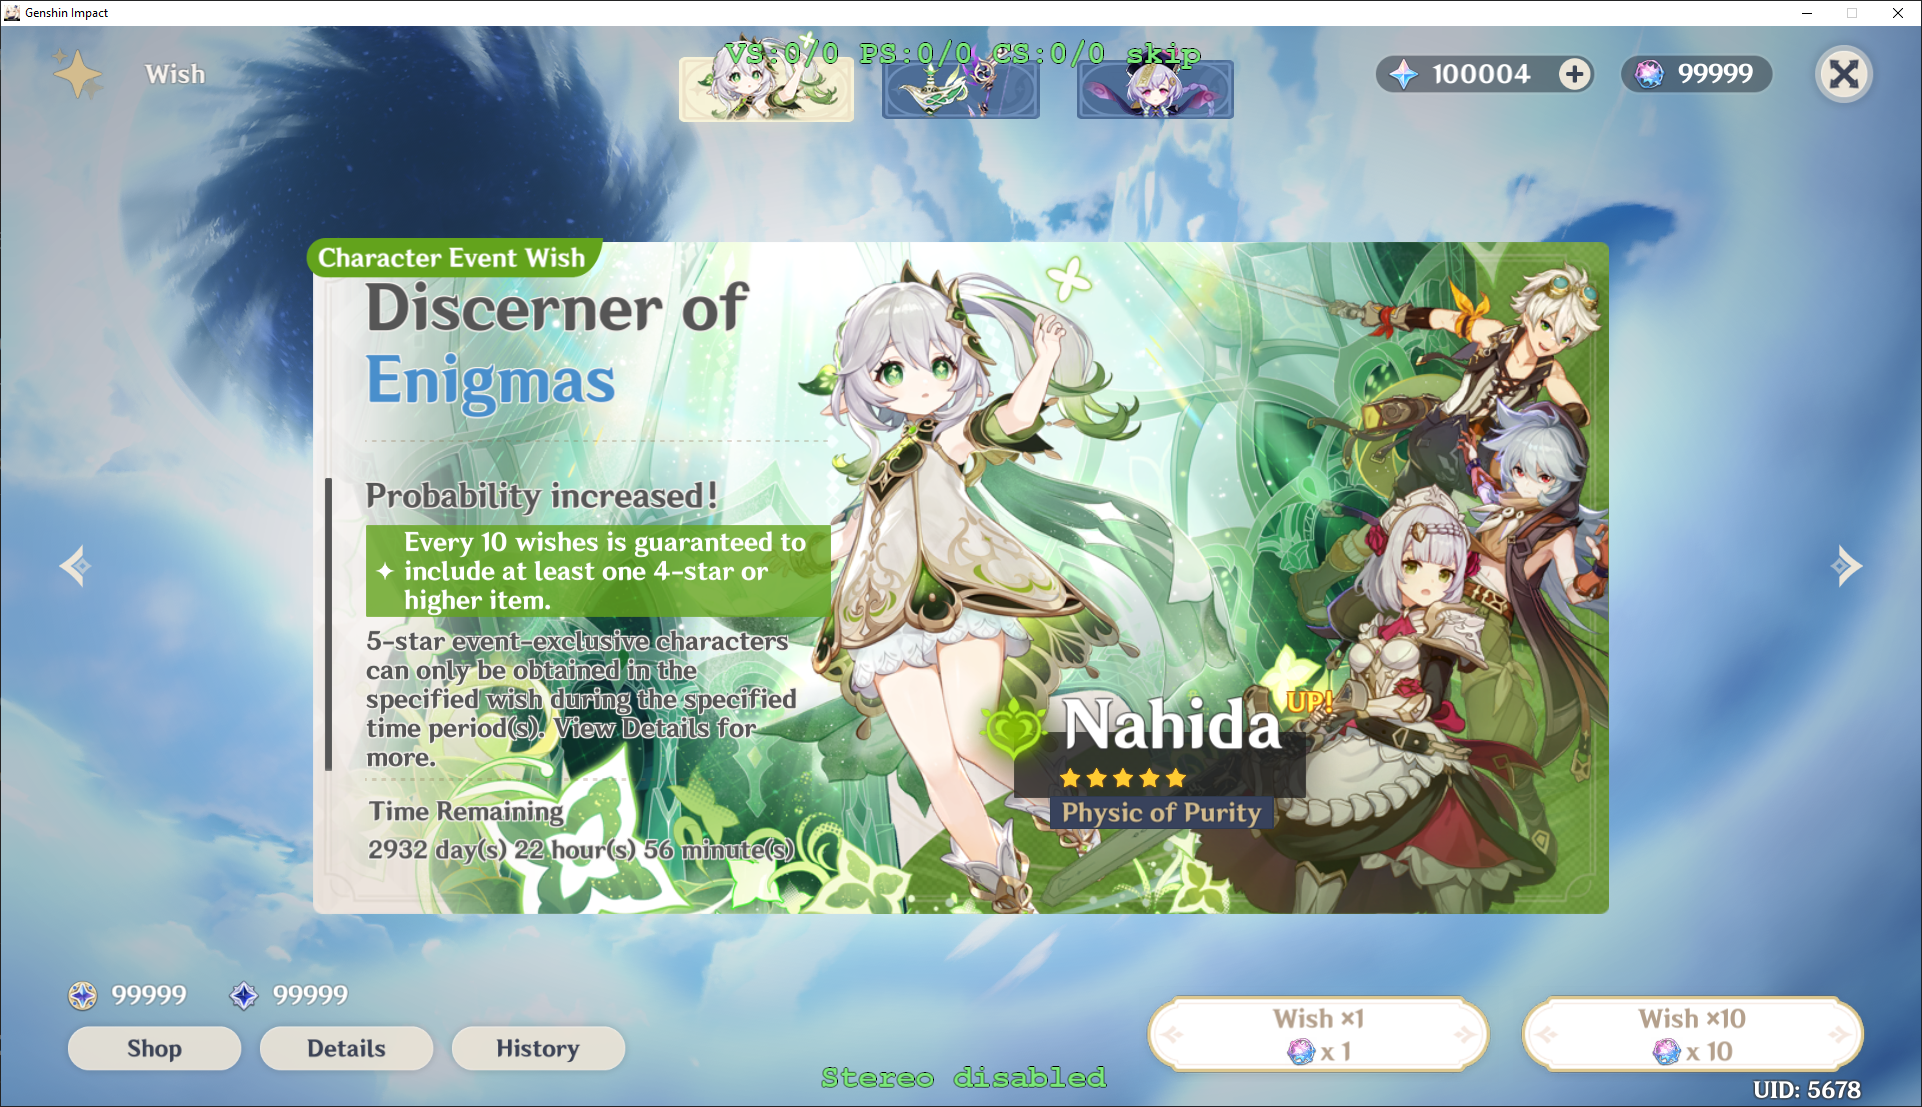
We press 1 and 2 on the numpad to cycle through the PS (pixel shaders) – we are looking for the shaders that causes the banner textures to disappear. Once you have found them, press 3 on the numpad to copy the hash
In this case, the hashes we are looking for are:
000d2ce199e12697(which draws the characters on the banner, the banner background, the icons on the top, the scroll bar and some of the text)

And `dcf5ad8be031c5fc` (which draws the card backgrounds, icons and the remaining text)
These are the hashes for version 3.2 of GI – while it is rare, sometimes shader hashes can change between versions.
Once we have these hashes, create an Banner.ini file (can be any name as long as extension is .ini) somewhere in the Mods folder with the following text:
ini[ShaderOverrideBanner1] hash = 000d2ce199e12697 analyse_options = dump_rt dump_tex dump_cb dump_vb dump_ib buf txt dds [ShaderOverrideBanner2] hash = dcf5ad8be031c5fc analyse_options = dump_rt dump_tex dump_cb dump_vb dump_ib buf txt ddsPress F10 in-game to reload changes. What the .ini file we just created will do is tell 3dmigoto what files to dump during a frame analysis – if you were unable to find the shader hashes (because the texture is only on-screen for a second for example), doing a full dump instead by uncommenting the line in d3dx.ini is an alternative.
Now, while still remaining on the wish screen press F8 – this performs a Frame Analysis dump, which dumps all the buffers and textures to the 3dmigoto folder, one that is named something like FrameAnalysis-YYYY-MM-DD-HHMMSS

If the folder is empty or only contains a log.txt and ShaderUsage.txt, make sure you have created and saved the .ini in the correct location, have pressed F10 to reload, and are on the screen with the texture you are looking for.
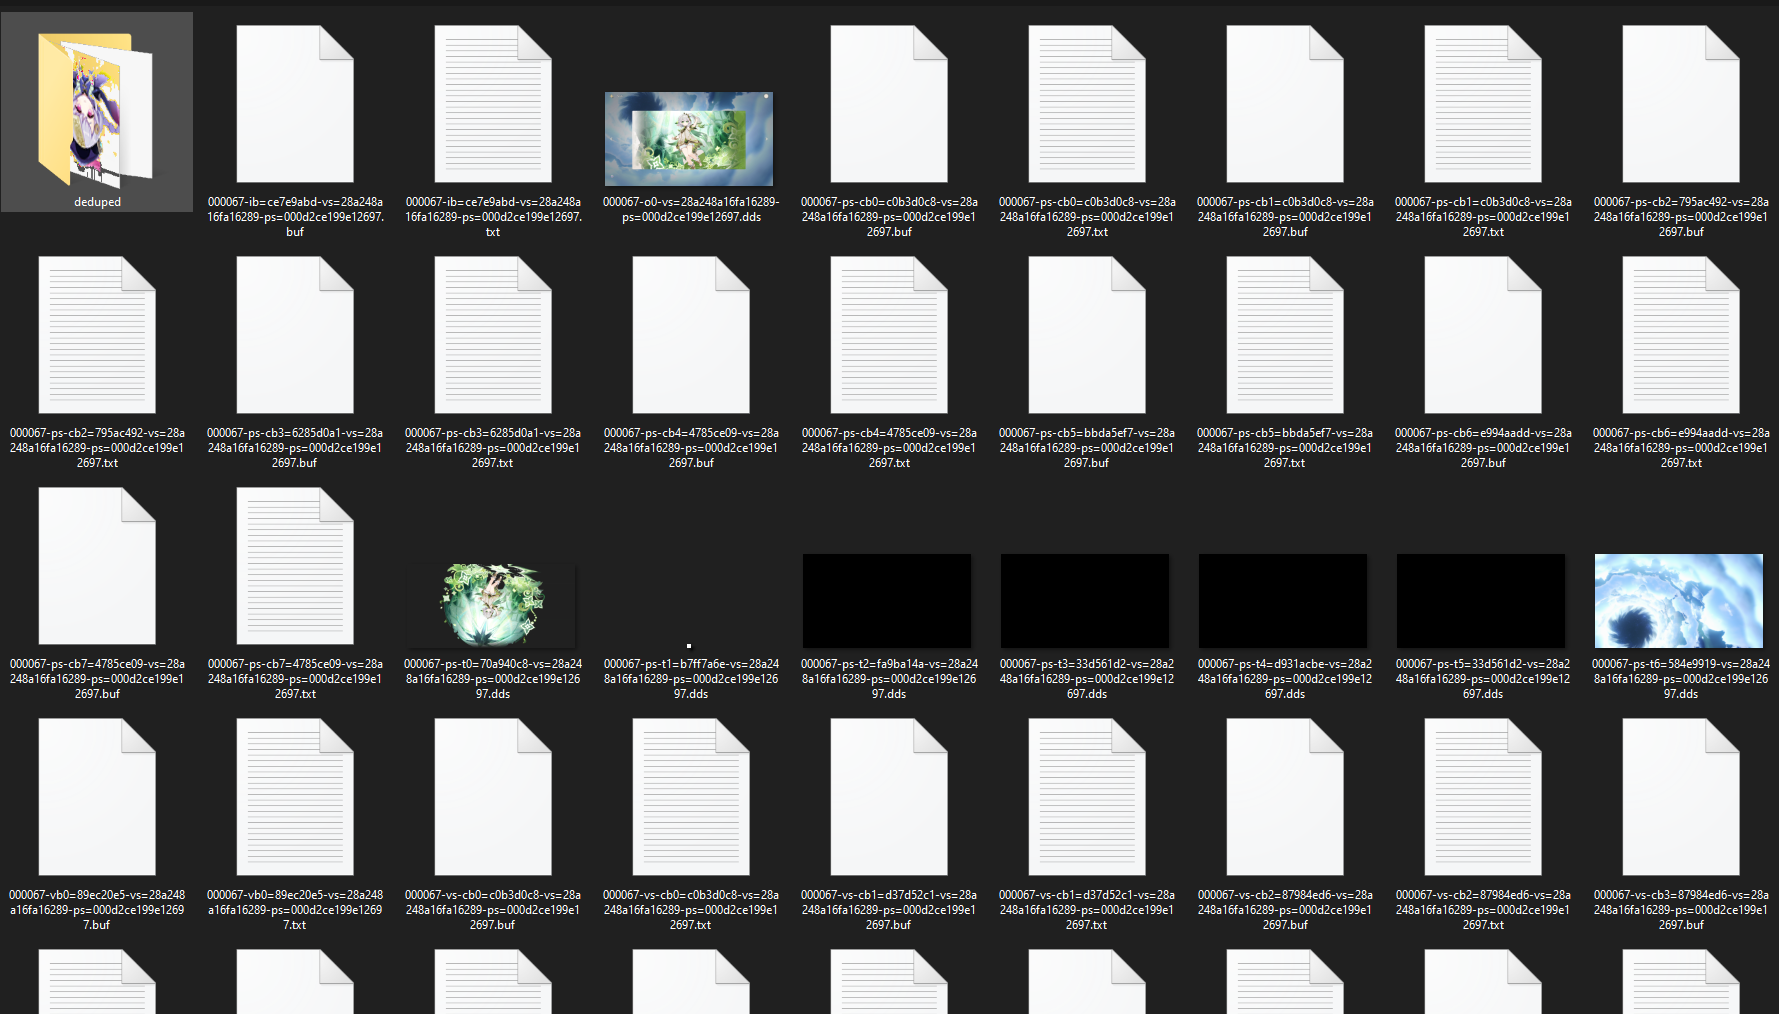
Once we have the folder, we can hunt through it looking for the textures we need. You can either look through the main folder which has the files sorted by draw ID (the string of 6 digits at the beginning of filenames which represents the order the textures are drawn in), or in the deduped folder which contains all the files but de-duplicated.
TIP: It can be helpful to have your dds editing software set to the default for opening .dds files, since it will let you see previews in Windows explorer.
After a bit of searching, we can find the textures we are looking for:
Card background (filenames were
000059-ps-t0=93073271-vs=8236b1752acd9b01-ps=dcf5ad8be031c5fc.ddsin the main folder and93073271-BC7_UNORM.ddsin deduped – the draw ID may be different for you):
Nahida (`000067-ps-t0=70a940c8-vs=28a248a16fa16289-ps=000d2ce199e12697.dds`, `70a940c8-BC7_UNORM.dds`):
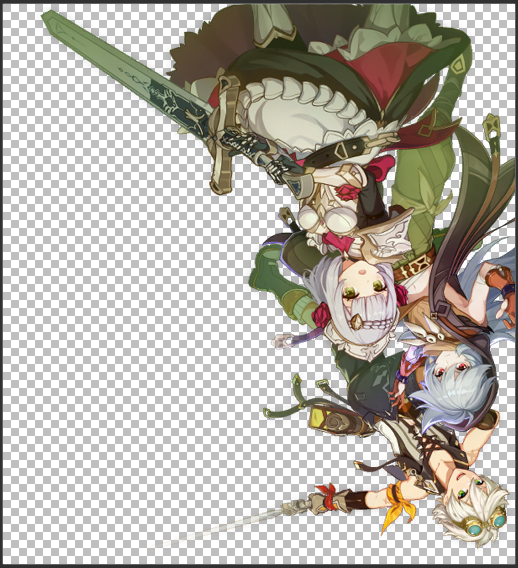
The side characters (`000069-ps-t0=ad520043-vs=28a248a16fa16289-ps=000d2ce199e12697.dds`, `ad520043-BC7_UNORM.dds`)
Tip: the o0 files show what is being drawn that ID, so you can use them to narrow down your search

There are a couple of other related textures as well, but for now we will focus on these three. Also note that changing text using 3dmigoto is very difficult unless that text is an icon (which it is not in this case).
Now we have the textures, we can get their hashes from their filenames.
For the files in the main folder, the structure is DrawID–BufferType–Hash–ShaderType-ShaderHash.Extension – for example, the card is
000059-ps-t0=93073271-vs=8236b1752acd9b01-ps=dcf5ad8be031c5fc.ddswhich means it has a DrawID of000059, is aps-t0buffer, has a hash of93073271, and is used by the vertex shader8236b1752acd9b01and pixel shaderdcf5ad8be031c5fcFor files in deduped, the structure is Hash – FileType. For the card the name is
93073271-BC7_UNORM.dds, which is a hash of93073271and a type ofBC7_UNORM.The most important information is the hash and type, since that is what we will be using – so in this case it is
93073271andBC7_UNORMfor the card,70a940c8andBC7_UNORMfor Nahida andad520043andBC7_UNORMfor the 4 star characters.Add the following lines to the Banner.ini:
ini[TextureOverrideDendroBannerCard] hash = 93073271 this = ResourceDendroBannerCard [TextureOverrideBannerNahidaBanner] hash = 70a940c8 this = ResourceNahidaBanner [TextureOverrideNahida4StarBanner] hash = ad520043 this = ResourceNahida4StarBanner [ResourceDendroBannerCard] filename = DendroBannerCard.dds [ResourceNahidaBanner] filename = NahidaBanner.dds [ResourceNahida4StarBanner] filename = Nahida4StarBanner.ddsWhat these lines tell the program to do is whenever it sees the hash of the texture in-game, it replaces it with a new texture (
DendroBannerCard.dds,NahidaBanner.dds, andNahida4StarBanner.ddsrespectively).Now, lets create those textures and add them to the same folder as the Banner.ini. Note that all 3 textures have
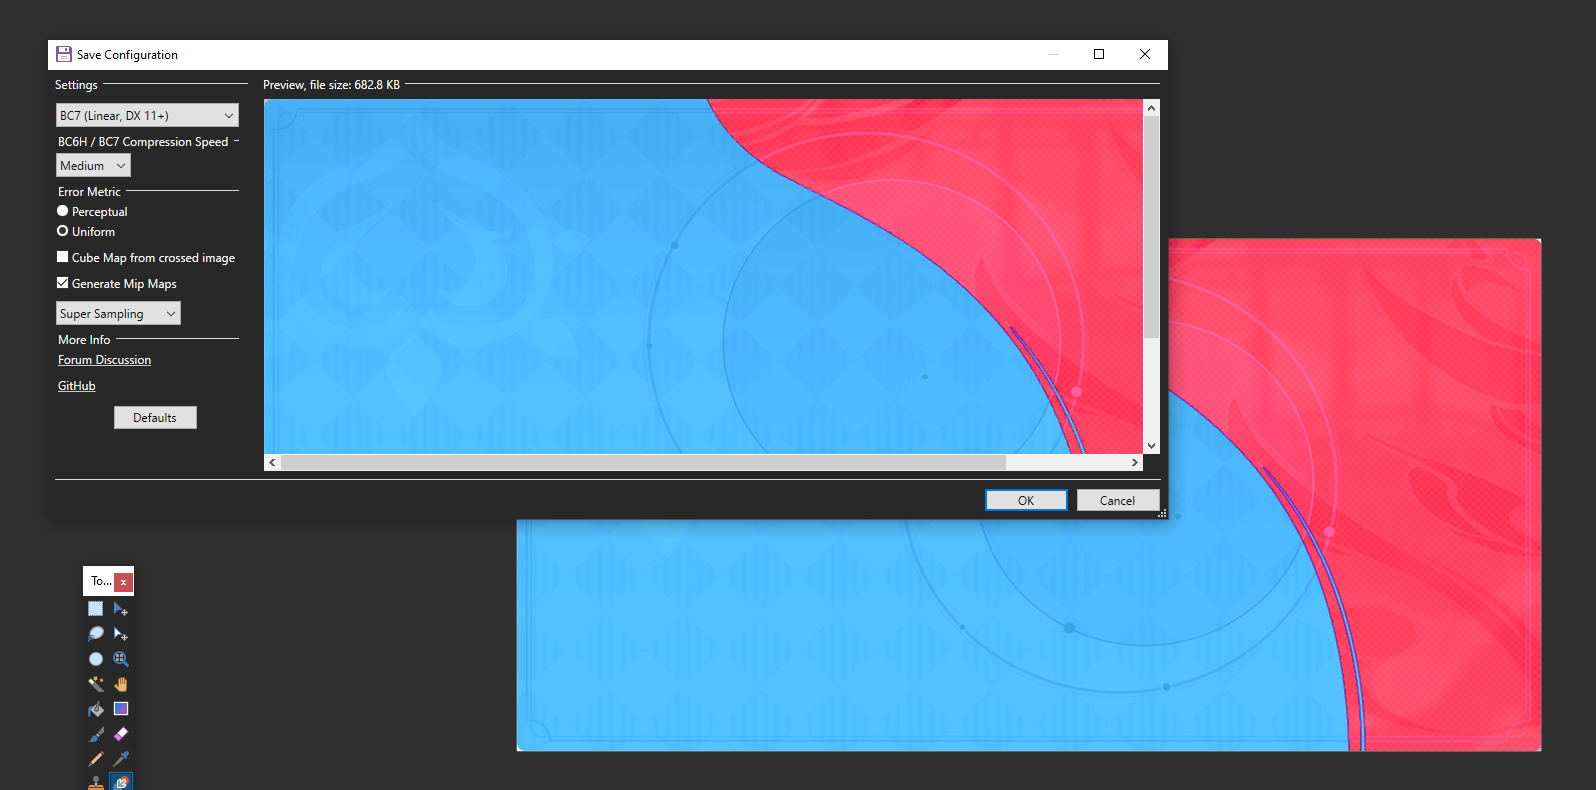
BC7_UNORMas their type, which corresponds toBC7 LinearFor the banner, I’ll give it a recolor and save it as
DendroBannerCard.dds(details on how to open and save dds files in the Mona Hat Removal tutorial)
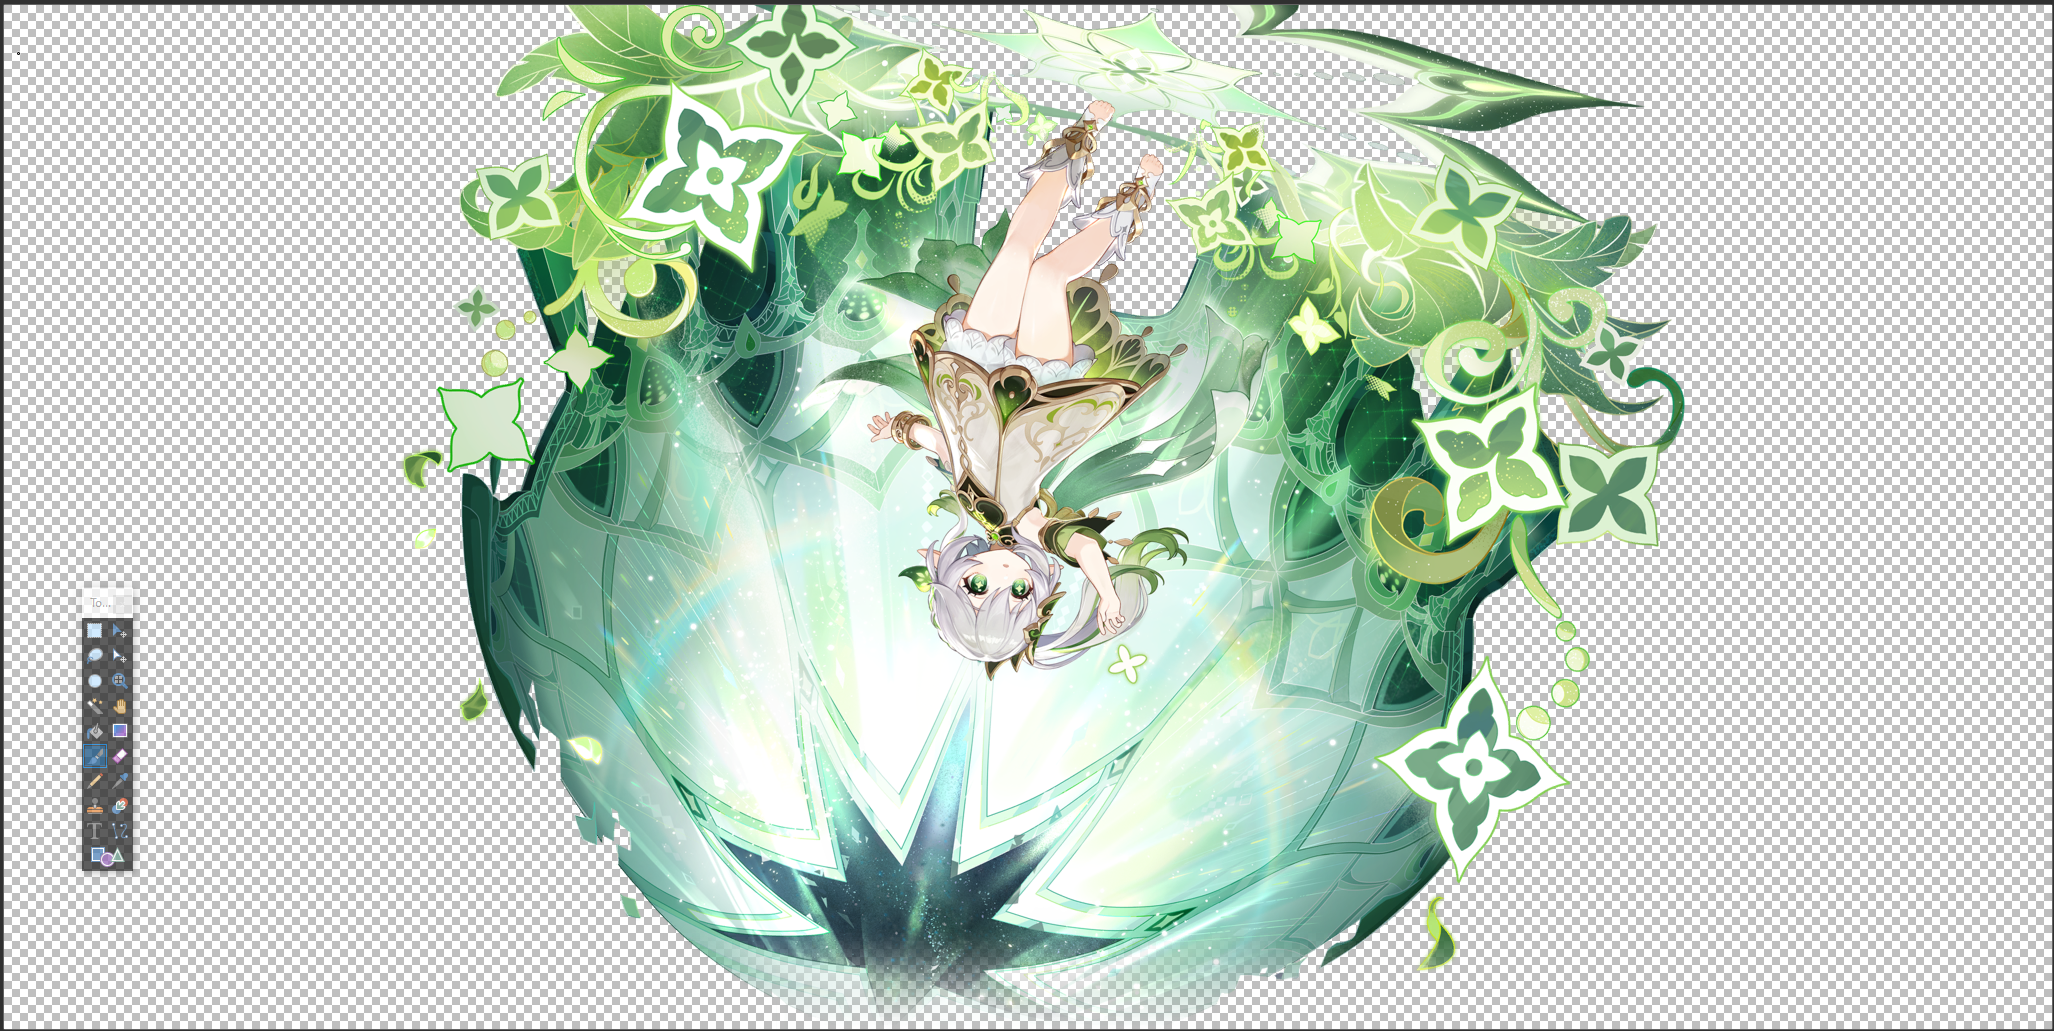
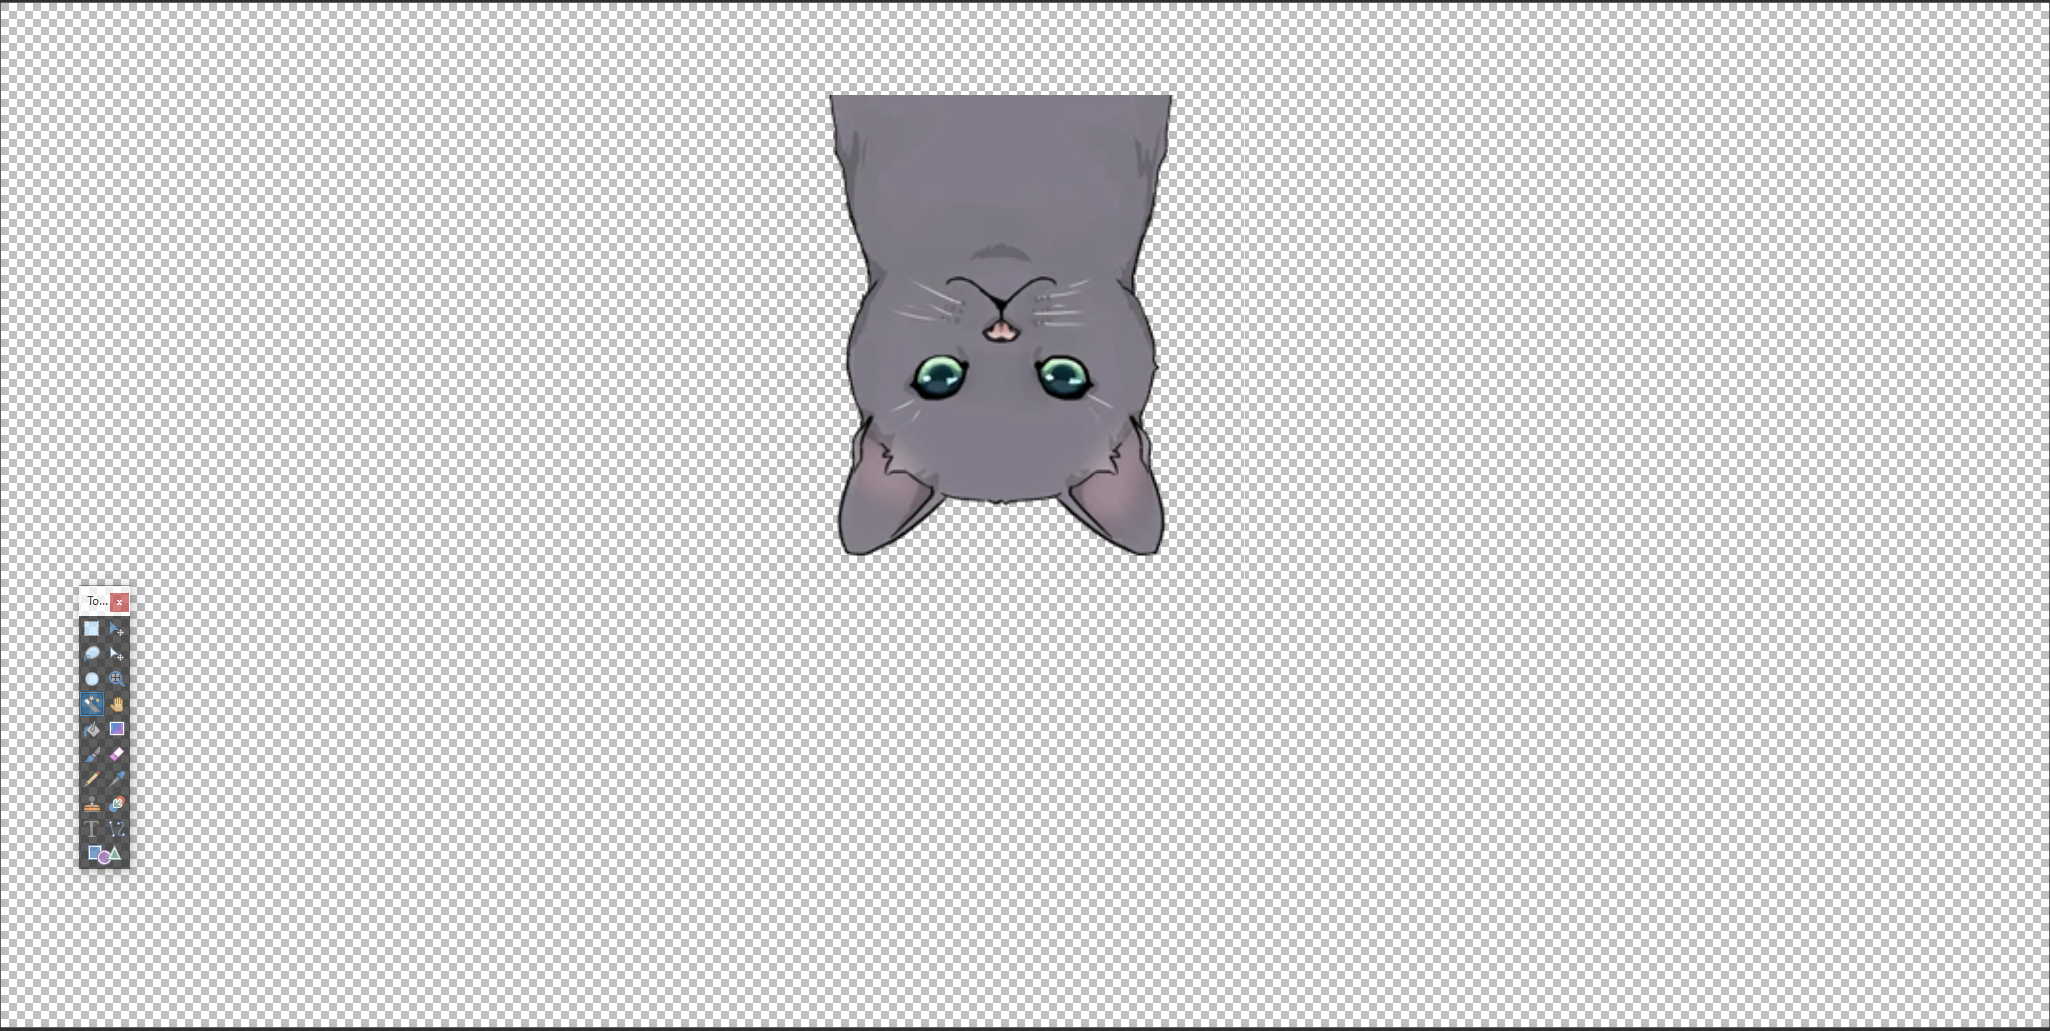
For Nahida, I’ll replace the texture with a jade eye cat – to get the size right, I make sure to compare to the original (has a size of 2048x1024, and the original is stored upside down):
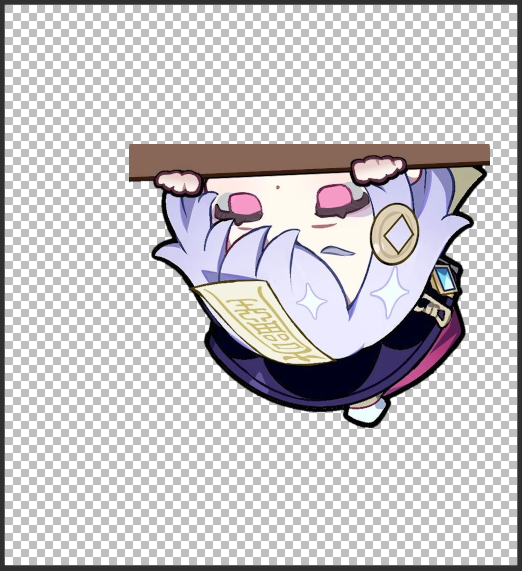
Finally, for the 4star characters I’ll add the true star of the banner (note this texture has a weird 560x512 size):
- Putting those 3 files into the same folder as the .ini and pressing F10 in game results in the following:
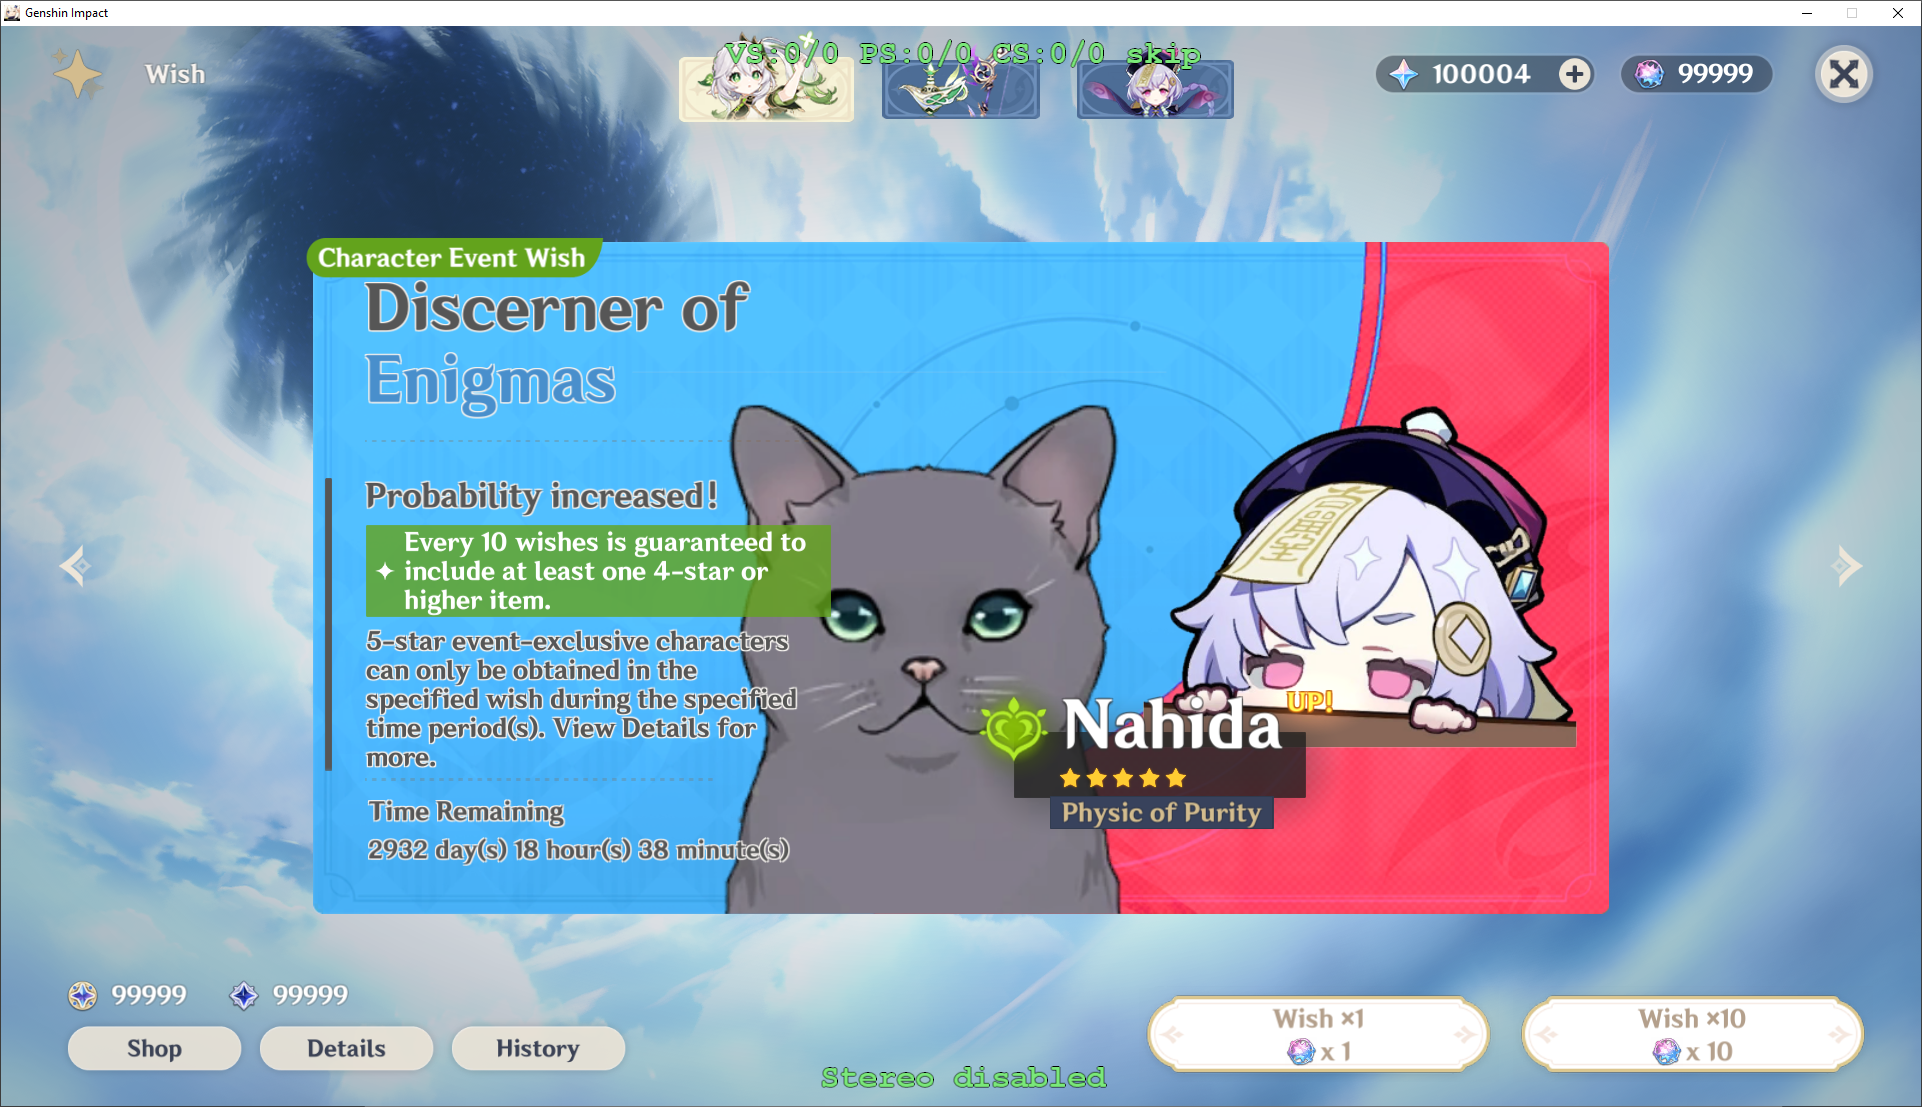
Success! First texture mod completed.
(If nothing happened after pressing F10, make sure you put the text in the .ini, the new dds images with the correct names in the same folder as the .ini, and no error messages popped up on screen)
(One other possibility is that the game is not checking for textures on that specific shader for whatever reason – try emptying out the ShaderFixes folder, and adding the line checktextureoverride = ps-tx where ps-tx is the original buffer of the texture (in this case, ps-t0) to the ShaderOverride sections to force 3dmigoto to check for textures on that shader)
Gliders
For another demonstration, let’s replace the textures on wing gliders. Unlike UI elements gliders do actually have a model (though it looks like a flat rectangle) so we can use the GIMI tools to make mods, but every single glider shares the same mesh. If we want to only mod one glider, we need to be more precise in what exactly we are replacing.
Similar to before, find the PS hash that draws the wings. We can pause while gliding in the overworld, and cycle through them with 1/2 on the numpad like before

In this case, the hash is
f8143fa00dc241fe(note that there are other shaders that cause the wings to disappear along with chunks of the environment, but we want to look for the one that is most unique to the wings):
We put the following lines an ini file (e.g. wings.ini) in the Mod folder:
ini[ShaderOverrideGlider] hash = f8143fa00dc241fe analyse_options = dump_rt dump_tex dump_cb dump_vb dump_ib buf txt ddsAnd press F10 to reload, followed by F8 to perform the frame dump.
Searching through the files, we can find the wings (
000081-ps-t0=d27db883-vs=7494a6d4010b8dec-ps=f8143fa00dc241fe.ddord27db883-BC7_UNORM_SRGB.dds).
And replace them with something else (NOTE: we can see from the filename that the type is
BC7_UNORM_SRGBnow, which means these are stored as BC7 SRGB instead of Linear).
We create the texture overrides and resources like so in a .ini:
ini[ShaderOverrideGlider] hash = f8143fa00dc241fe analyse_options = dump_rt dump_tex dump_cb dump_vb dump_ib buf txt dds [TextureOverrideFirstFlight] hash = d27db883 this = ResourceFirstFlight [ResourceFirstFlight] filename = WingsOfFirstFlight.ddsAnd press F10 to reload in-game: